
Add
Individual
Desktop
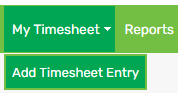
1. Hover on My Timesheet > click Add Timesheet Entry:
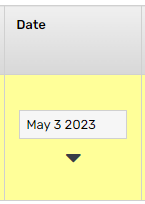
2. By default, you will be taken to the current date. If you need to choose a different date, update the Day field:

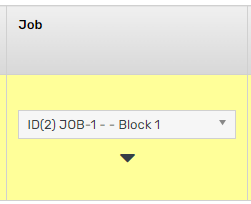
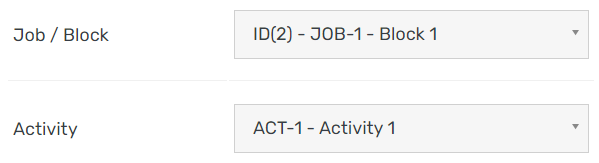
3. Select a Job (optional):

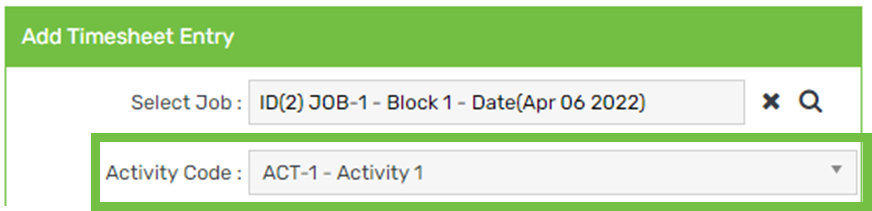
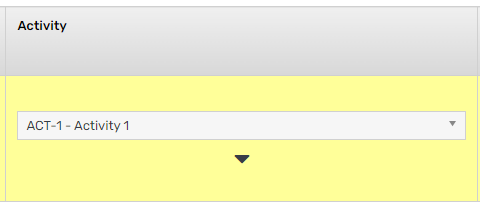
4. Select an Activity Code:
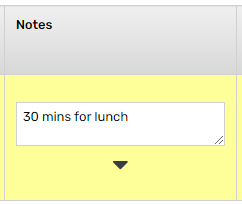
5. Enter Notes (optional):

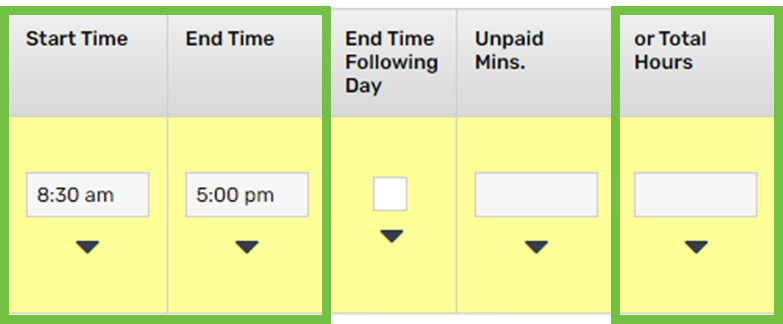
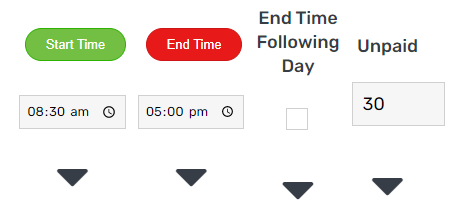
6. Enter a Start Time and End Time or Total Hours:
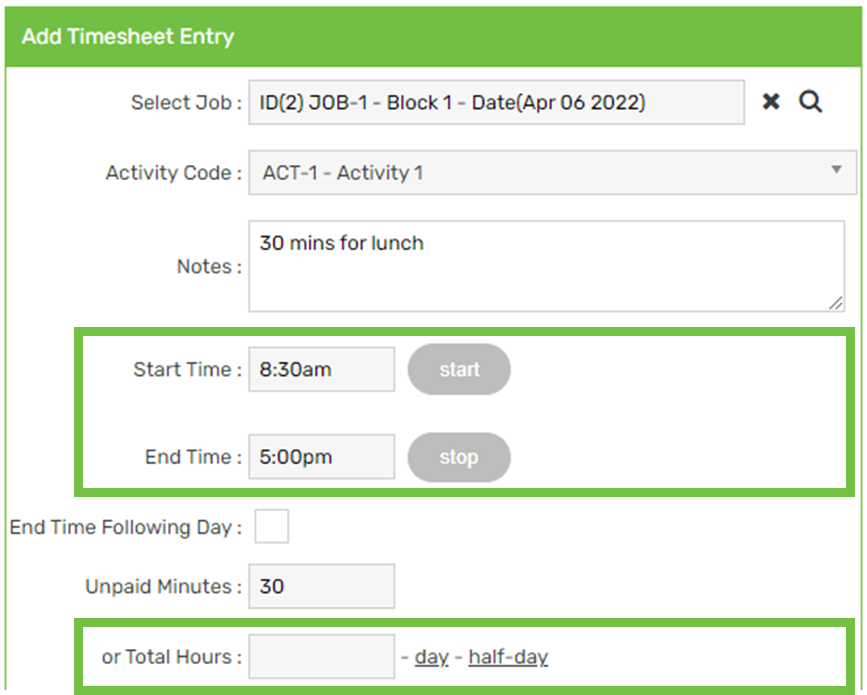
7. If you worked a night shift that ended the next day, tick End Time Following Day:

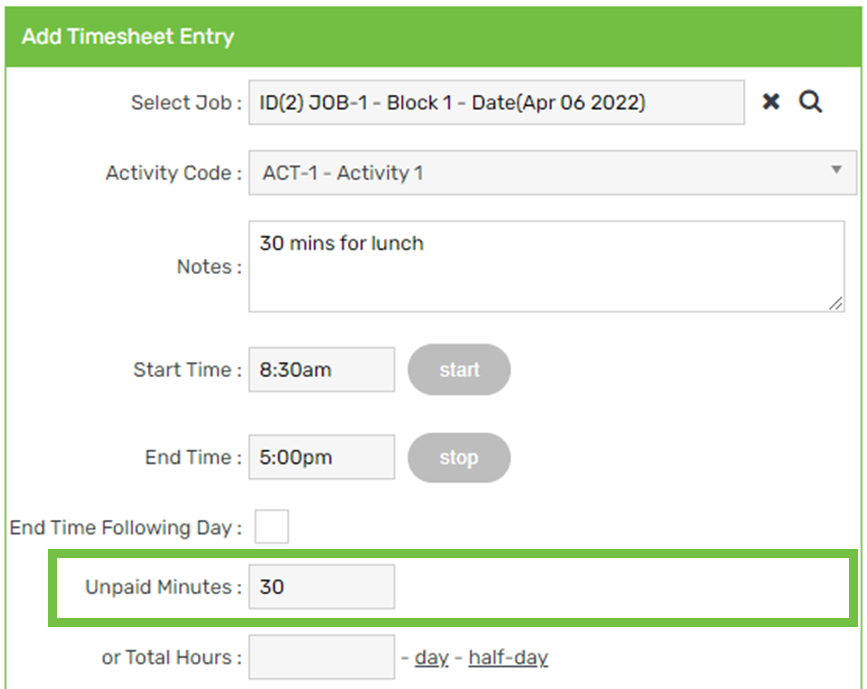
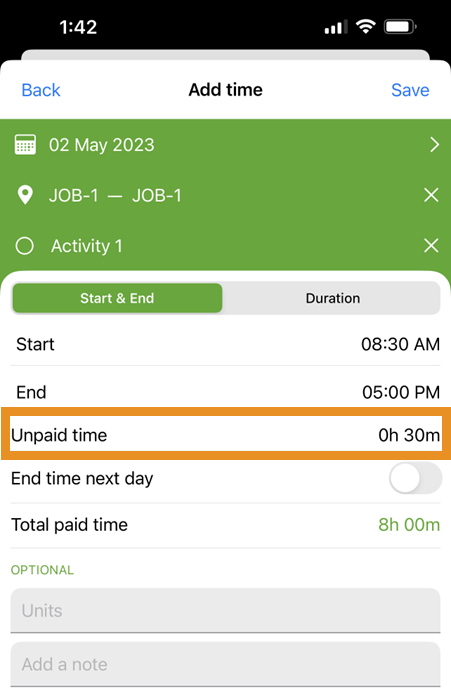
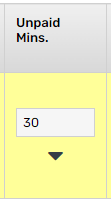
8. Enter Unpaid Minutes (optional):
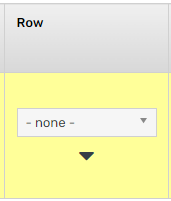
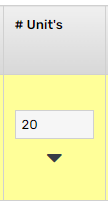
9. Select a Row or enter Units (optional):
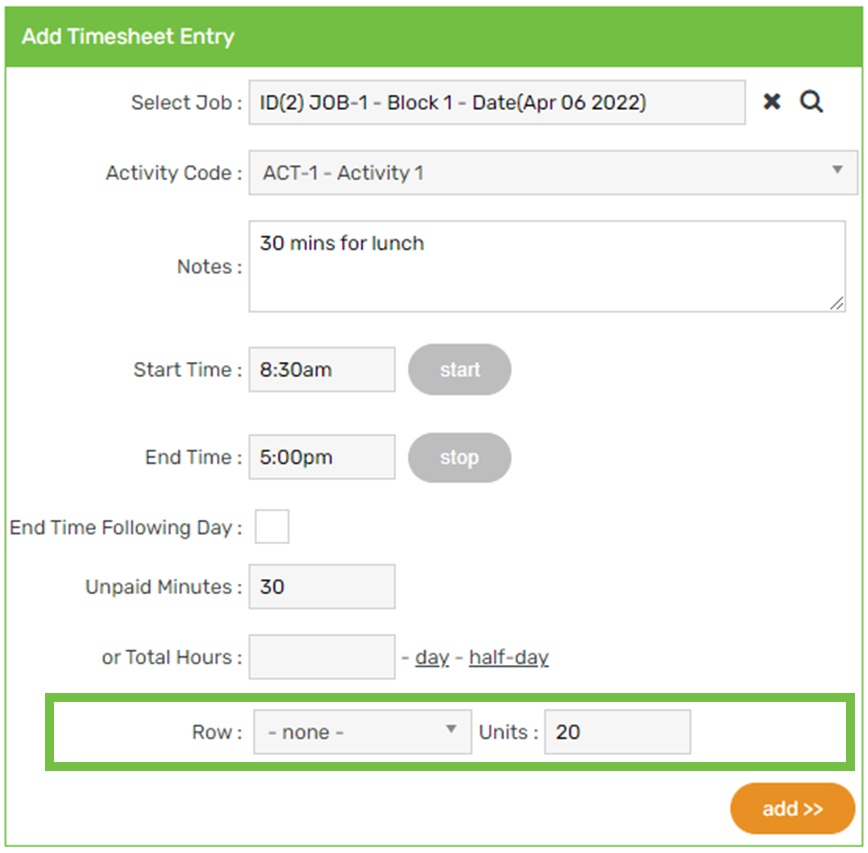
10. Click Add
App
Real-time
1. Tap START TIMER:
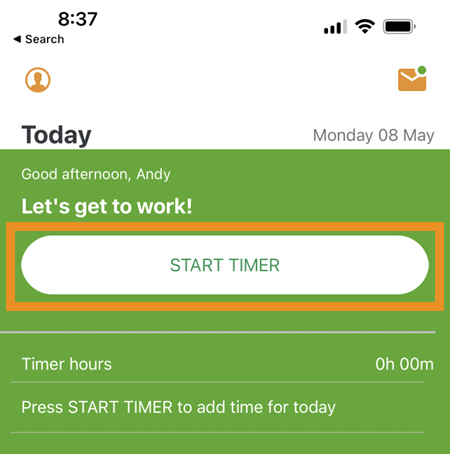
This will clock you in:
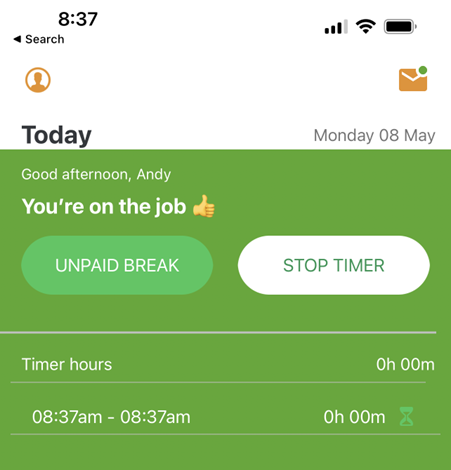
2. To take an unpaid break e.g. Lunch, tap UNPAID BREAK:
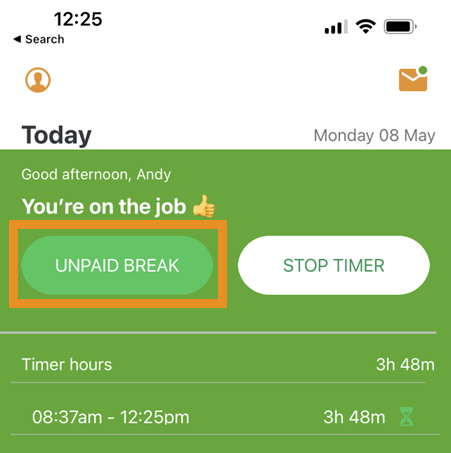
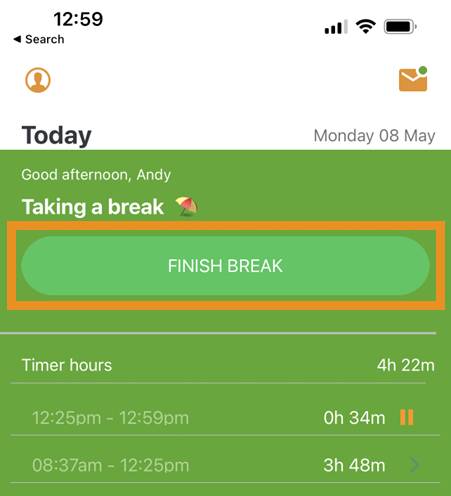
3. To clock back in after taking an unpaid break, tap FINISH BREAK:
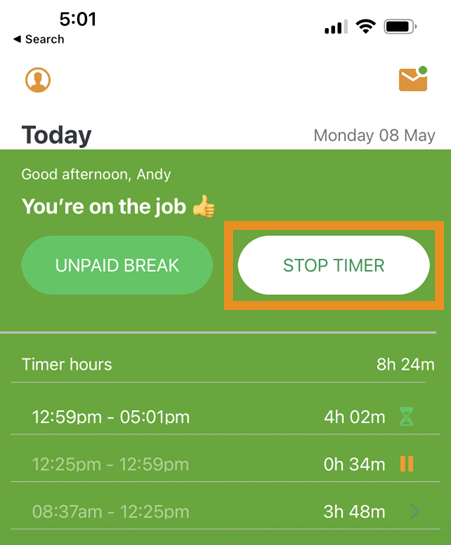
4. To clock out for the day, tap STOP TIMER:
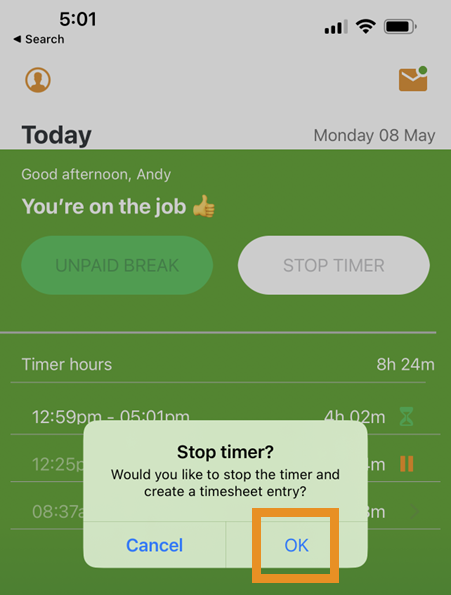
5. Tap OK:
6. Select a Job (optional):
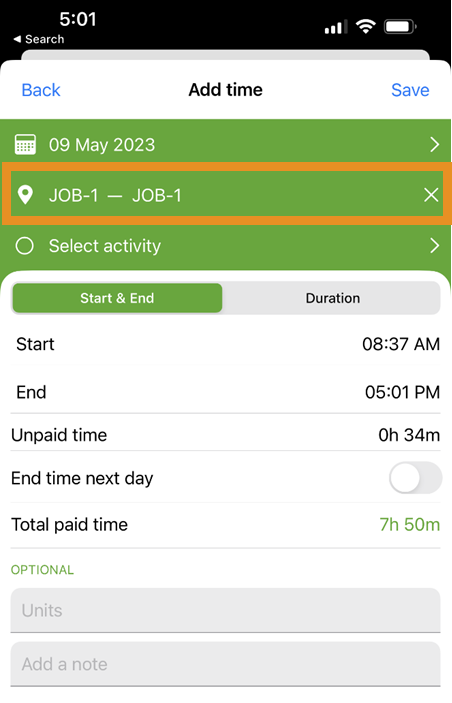
7. Select an Activity:
8. Enter Units and/or Notes (optional):
9. Tap Save:

In retrospect
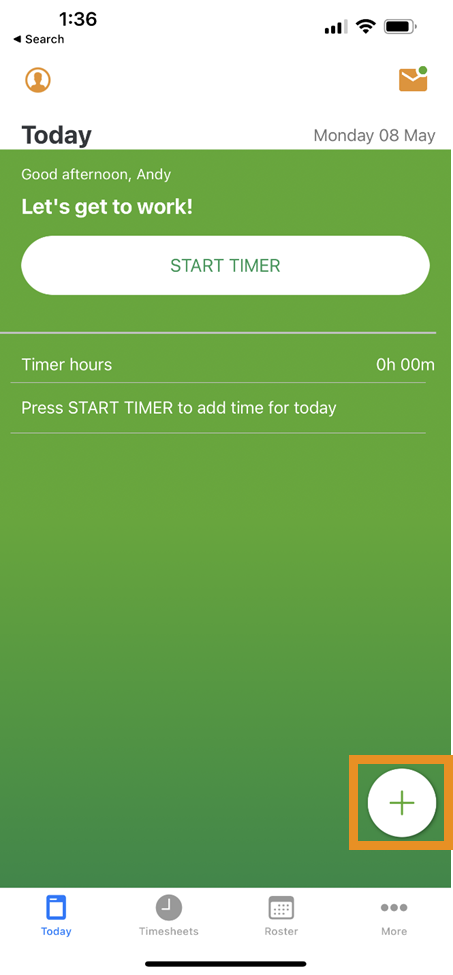
1. Tap the plus icon:
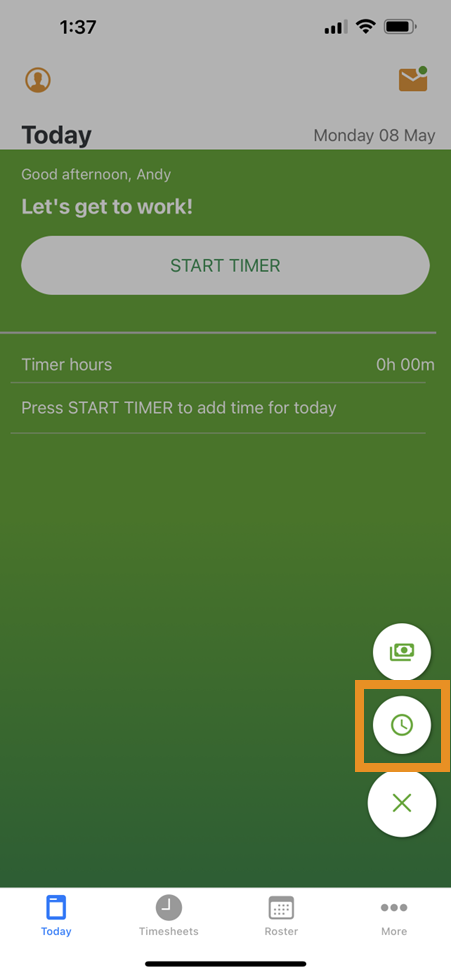
2. Tap the clock icon:
3. The current date will be displayed by default. To select a different date, tap on the date field:
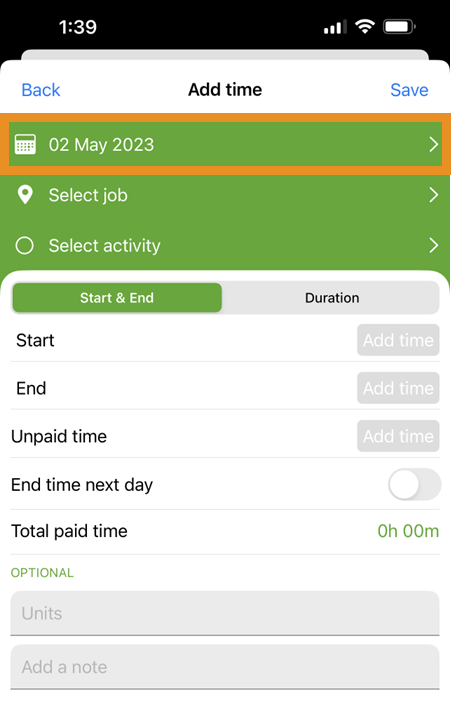
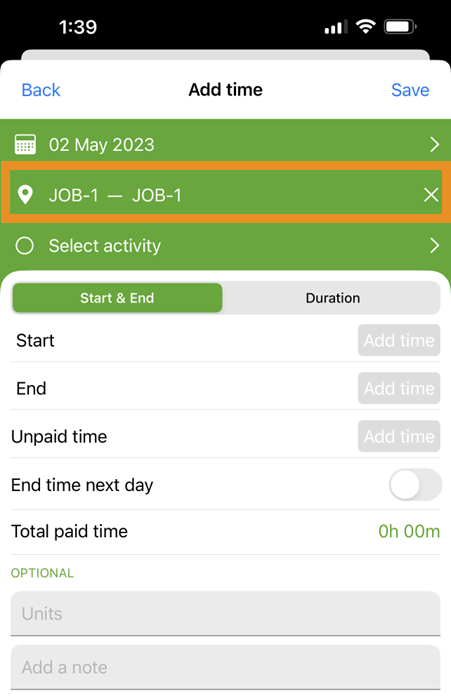
4. Select a Job (optional):
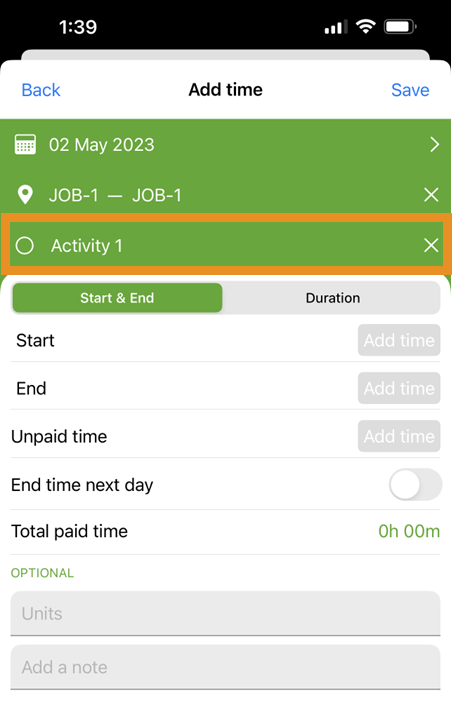
5. Select an Activity:
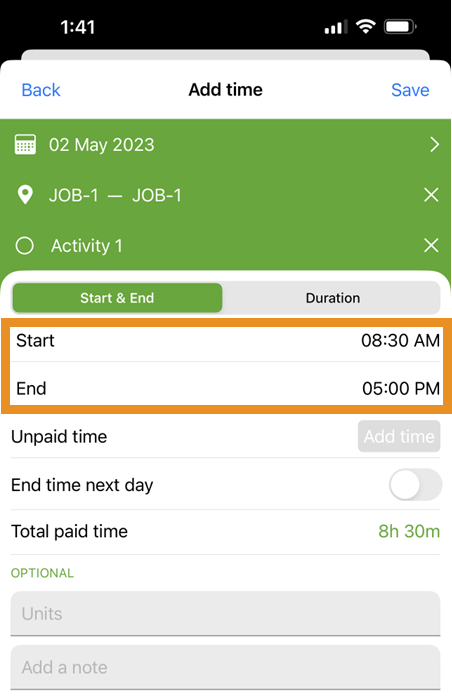
6. Add a Start and End time:
7. Add Unpaid time (optional):
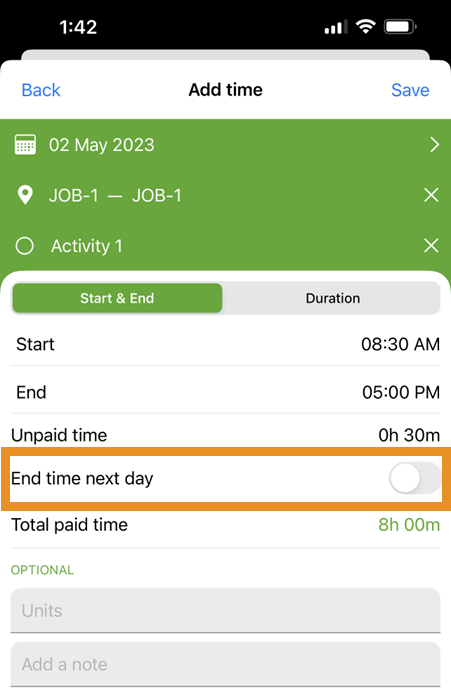
8. If you worked a night shift that ended the next day, tap End time next day:
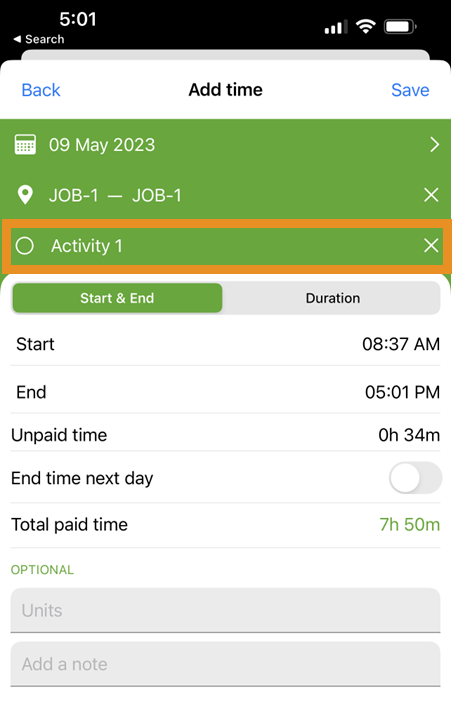
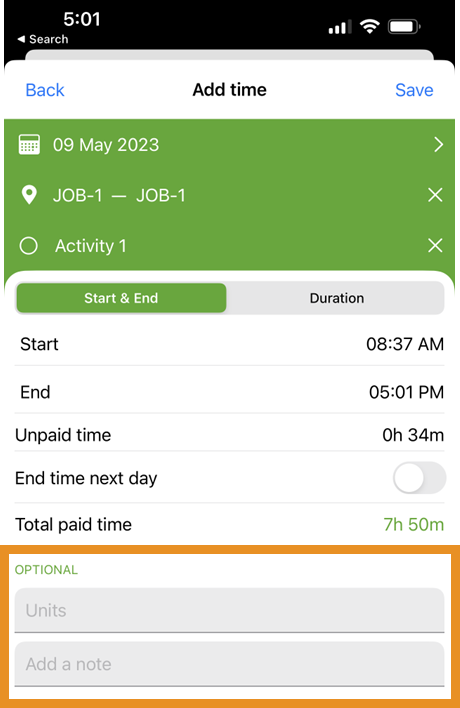
9. Add Units (optional):

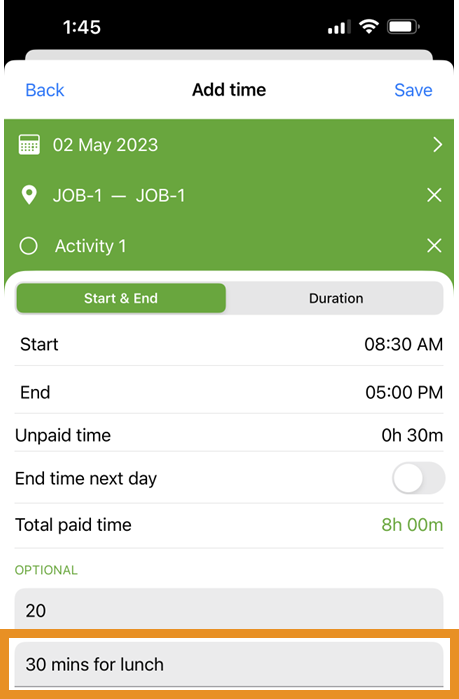
10. Add Notes (optional):
11. Tap Save
Bulk
Enter time for multiple employees for the same date
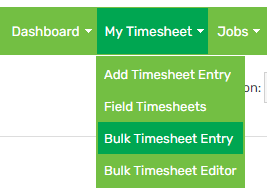
1. Hover on My Timesheet > click Bulk Timesheet Entry:
2. Select a Date:
3. Select a Job (optional):
4. Select an Activity:
5. Select a Row (optional):
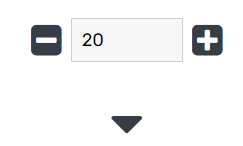
6. Enter Units (optional):
7. Enter a Start Time and End Time or Total Hours:
8. Enter Unpaid Mins (optional):
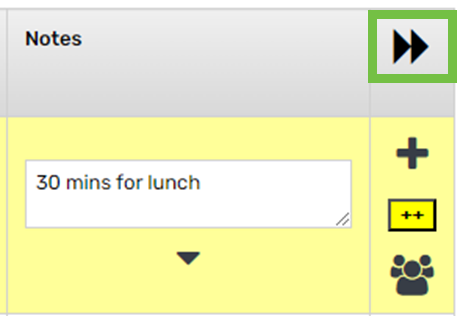
9. Enter Notes (optional):
10. Click one of the following icons:
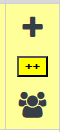
Plus icon
a. Click the icon to create one timesheet:

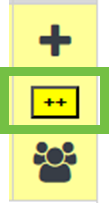
Double plus icon
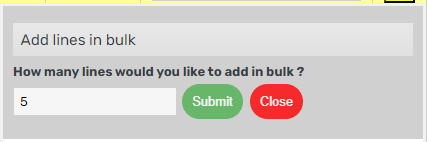
a. Click the icon:

b. Enter the number of timesheets that you want to create:
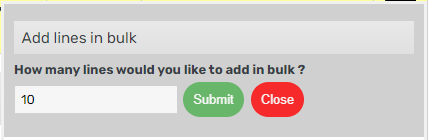
c. Click Submit
Team icon
a. Click the icon:

b. Select a team or all employees to create timesheets for:
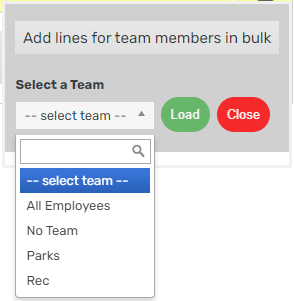
c. Click Load
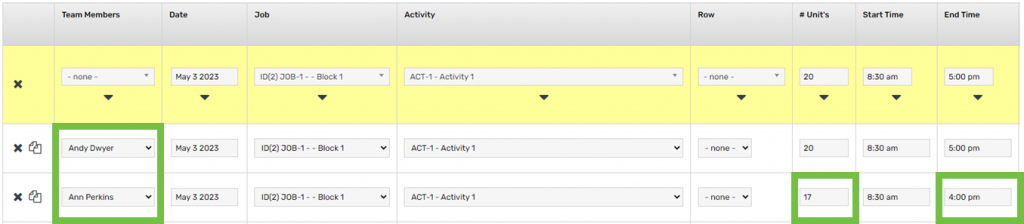
11. Update timesheet details on an individual basis if required:
12. Click the double arrow icon to submit the timesheets:
Enter time for one employee for multiple dates
1. Hover on My Timesheet > click Bulk Timesheet Entry:
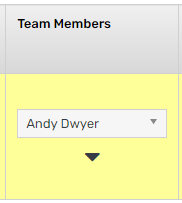
2. Select a Team Member:
3. Clear the Date:

4. Select a Job (optional):
5. Select an Activity:
6. Select a Row (optional):
7. Enter Units (optional):
8. Enter a Start Time and End Time or Total Hours:
9. Enter Unpaid Mins (optional):
10. Enter Notes (optional):
11. Click the double plus icon:
12. Enter the number of timesheets that you want to create:
13. Click Submit
14. Enter the date for each timesheet:
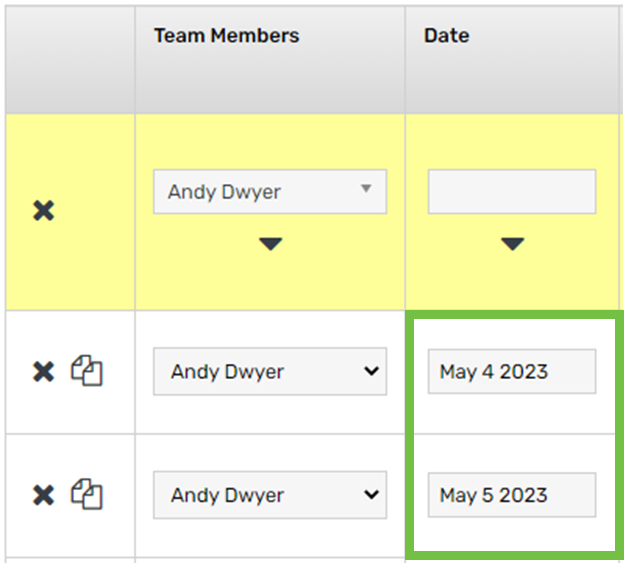
15. Click the double arrow icon to submit the timesheets:
Import
1. Hover over My Timesheet and click Timesheet Import.
2. Upload the timesheet file by clicking Choose File, selecting the file, clicking Open, and then clicking Next.
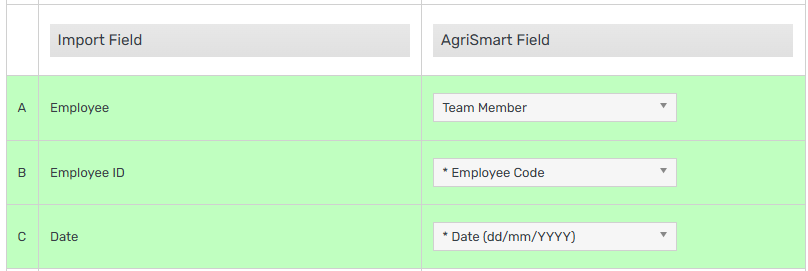
3. Map each field to where it needs to go in AgriSmart:
4. Save the mapping as a template to reuse it for future imports (optional).
5. Click Save & Continue.
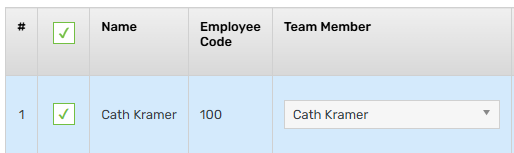
6. Review the timesheets then click the checkbox to the left of the employees’ names. To select all, click the checkbox in the grey header to the left of the Name column:
7. Scroll down and click Save.
8. Repeat steps 6 & 7 for each page.
9. Click Timesheet Import Main (top right of the screen) to check the Percent Complete field. This should show 100%. If it’s less, some timesheets didn’t import. Click the edit icon next to the import to review. Successfully imported timesheets will be blue. Errors will be red with an alert icon—click it to see why. Unhighlighted timesheets haven’t been imported, so select them to import.
Field
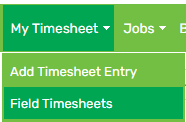
1. Hover on My Timesheet > click Field Timesheets:
2. Click Time:

3. Select a Job and Activity:
4. Enter a Unit Rate (optional):

5. The current date will be displayed by default. To select a different date, click on the Date field:

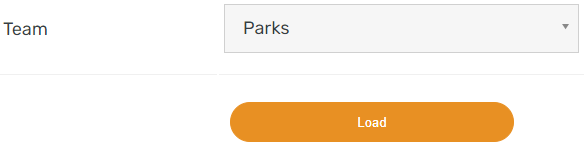
6. Select a Team > click Load:
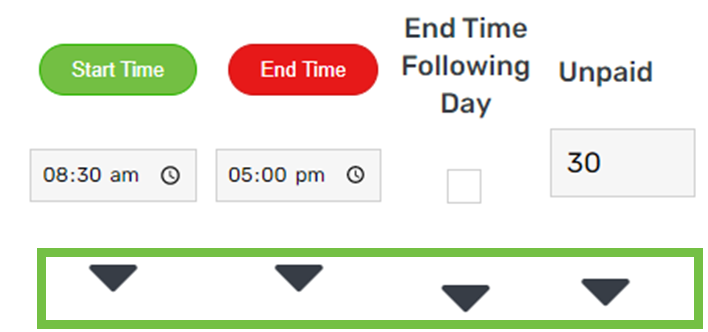
7. Enter the Start Time, End Time and Unpaid Minutes:
8. Click each arrow that has data above it:
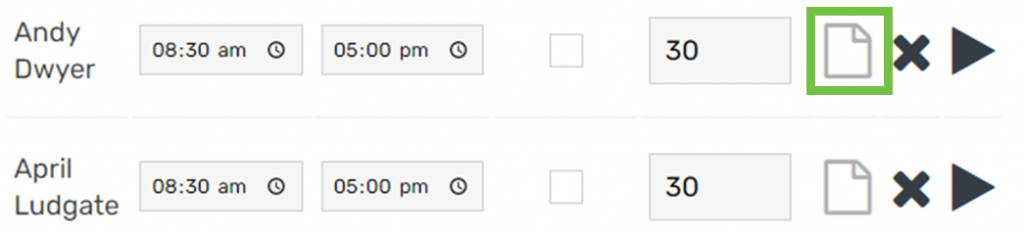
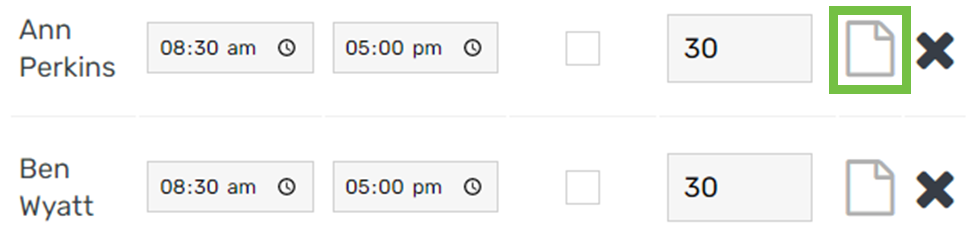
9. To add a note for an employee, click the paper icon:
10. To add units, click Add Units. If there are no units to add, skip to step 12:

11. Enter the units then click the arrow:
12. Click Submit
13. Click Send All:

Multiple activity timesheets
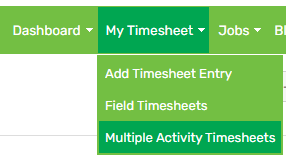
1. Hover on My Timesheet > click Multiple Activity Timesheets:
2. Click Time:
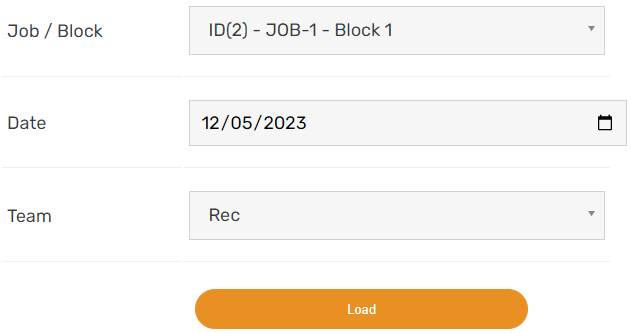
3. Select a Job, Date and Team, then click Load:
4. Enter the Start Time, End Time and Unpaid Minutes:
5. Click each arrow that has data above it:
6. To add a note for an employee, click the paper icon:
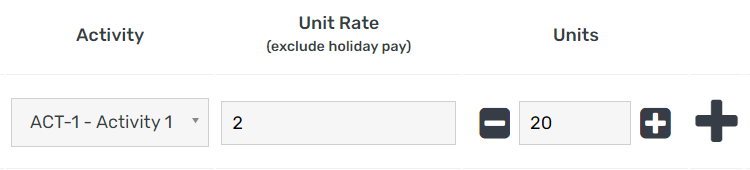
7. Click Add Units:
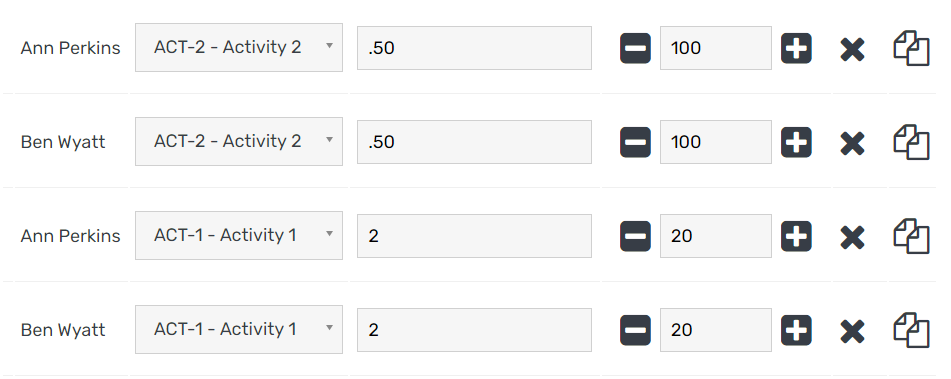
8. Select an Activity, enter the Unit Rate (optional) and Units, then click the plus icon:
9. Select another Activity, enter the Unit Rate (optional) and Units, then click the plus icon:

Your screen should look similar to the below:
10. Click Submit
11. Click Send All:
Edit
Individual
Desktop
1. Hover on My Timesheet > click Add Timesheet Entry:
2. By default, you will be taken to the current date. If you need to choose a different date, update the Day field:
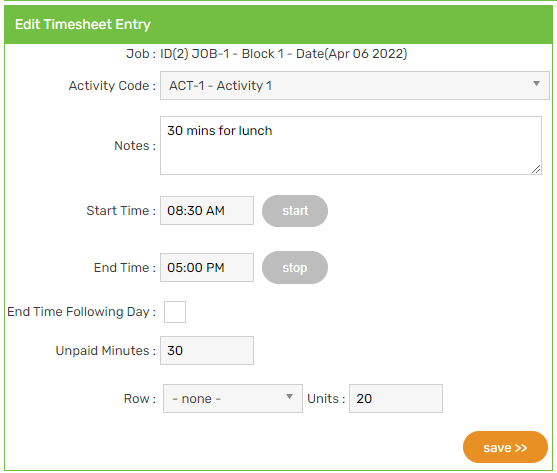
3. Click the pencil icon in line with the timesheet that you want to edit:

4. Make the changes then click Save:
App
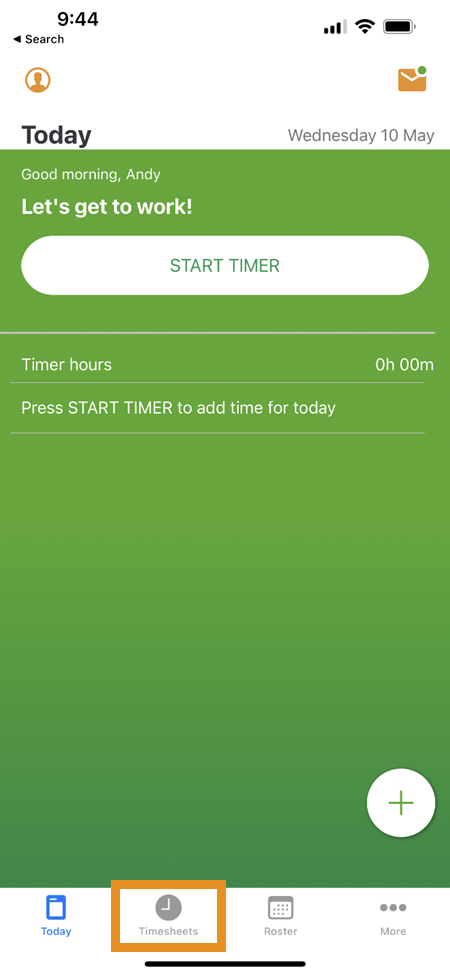
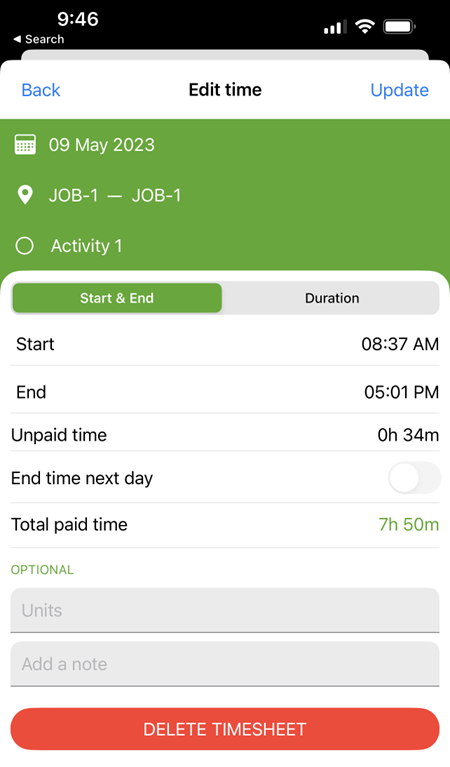
1. Tap Timesheets:
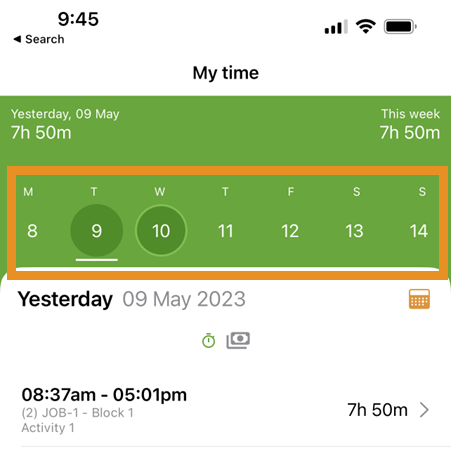
2. By default, you will be taken to the current date. If you need to choose a different date, tap the calendar bar:
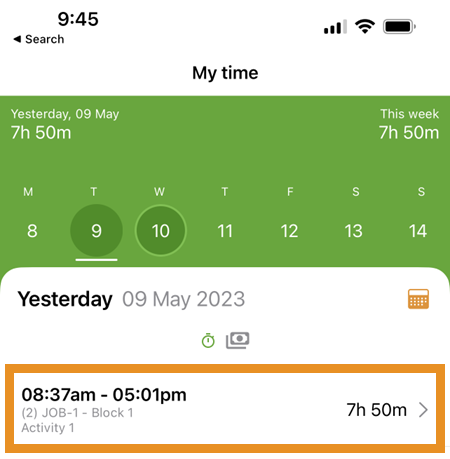
3. Tap the timesheet you wish to edit:
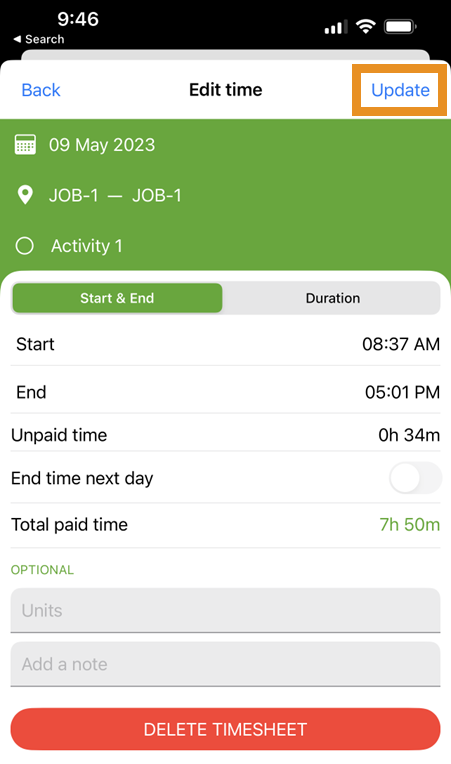
4. Make the changes then tap Update:
Bulk
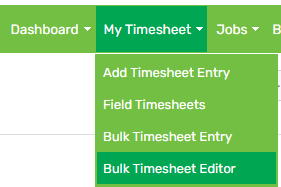
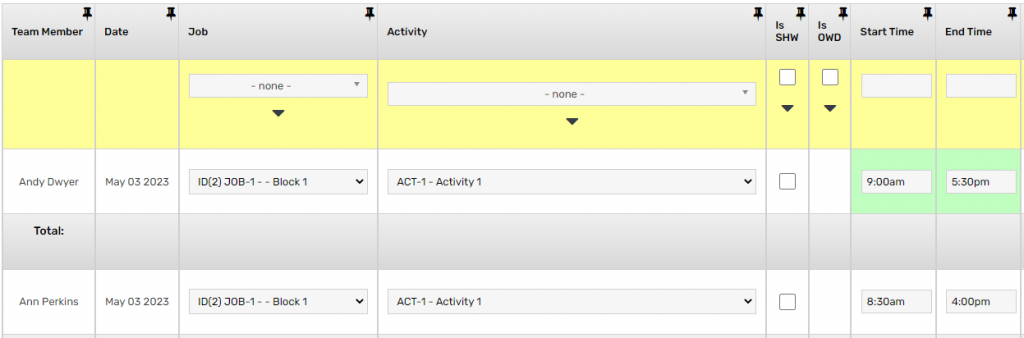
1. Hover on My Timesheet > click Bulk Timesheet Editor:
2. Update the filters > click GO:

3. Make the changes:
4. Scroll down to the bottom and click Save
Delete
Individual
Desktop
1. Hover on My Timesheet > click Add Timesheet Entry:
2. By default, you will be taken to the current date. If you need to choose a different date, update the Day field:
3. Click the cross icon in line with the timesheet that you want to delete:

4. Click OK
App
1. Tap Timesheets:
2. By default, you will be taken to the current date. If you need to choose a different date, tap the calendar bar:
3. Tap the timesheet you wish to delete:
4. Tap Delete:
5. Tap Yes
Bulk
1. Hover on My Timesheet > click Bulk Timesheet Editor:
2. Update the filters > click GO:
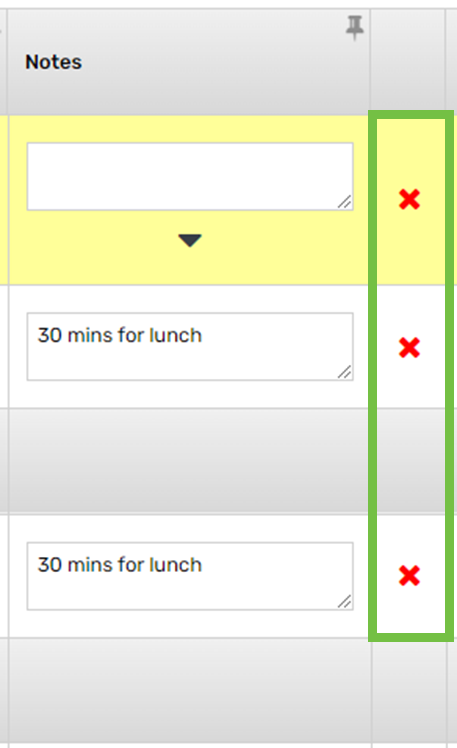
3. To delete multiple timesheets, scroll to the far right-hand side and click the cross icon next to each one that you want to remove:
4. Scroll down to the bottom and click Save