
How-to
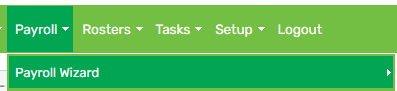
1. Hover on Payroll and click Payroll Wizard:
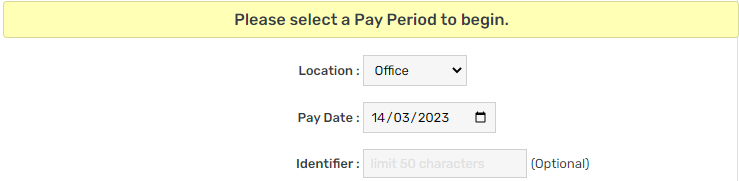
2. Select a Location (optional), Pay date and Identifier (optional):
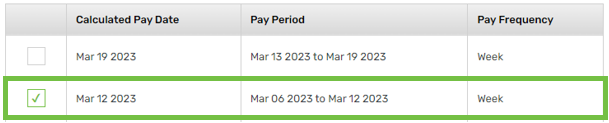
3. Select a Pay period:
4. Click Next
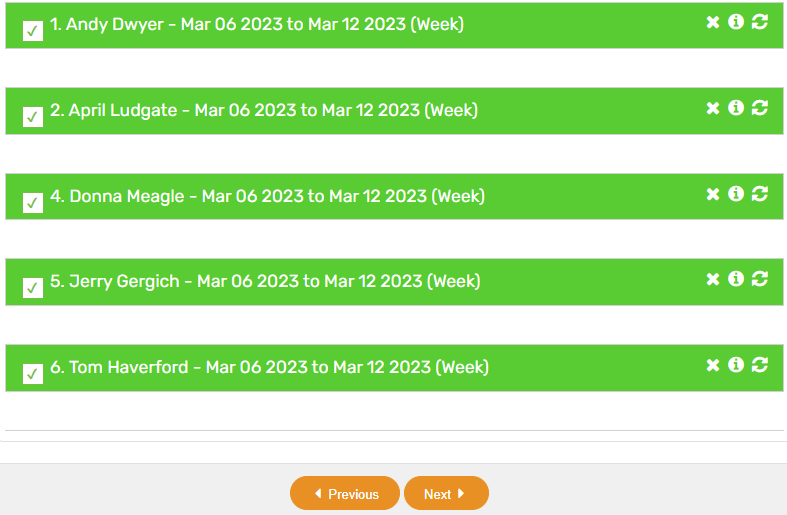
5. Check the timesheets for the period. If this has already been done, click click here to skip this step:

Once the first employee has been reviewed, tick the checkbox next to their name to bring up the next employee:

Follow this process until all timesheet entries have been checked, then click Next:
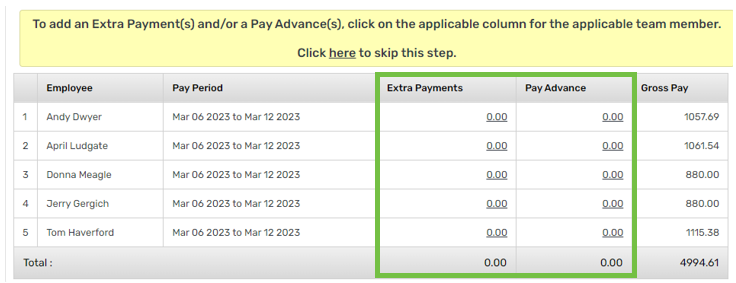
6. Add an Extra payment(s) or Pay advance(s) if required, otherwise click Next:
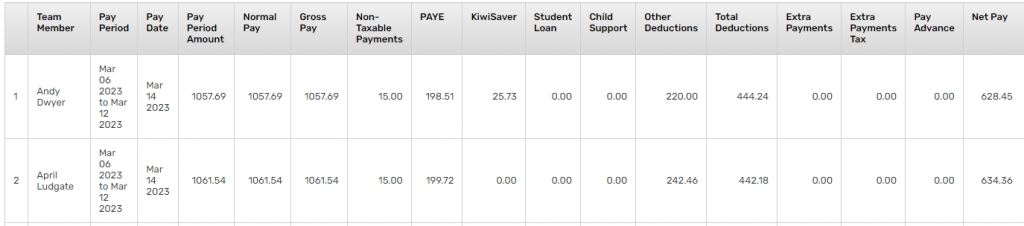
7. Review the payslip items:
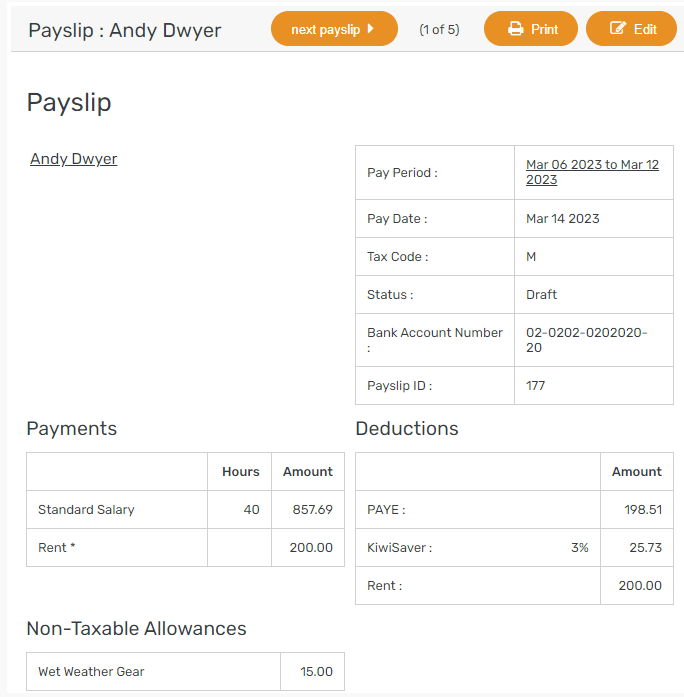
Edit and navigate through each payslip by clicking the applicable action button which is located at the top right-hand side of each payslip:

Once the payslips have been checked, return to the payslip items table, then click Next:
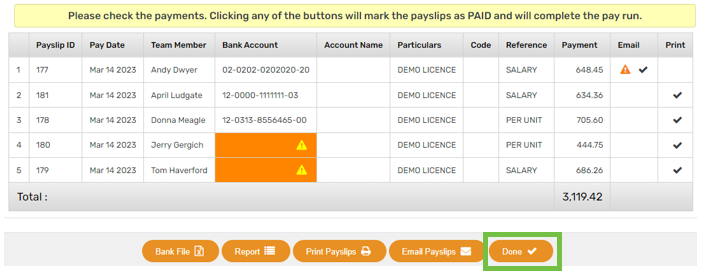
8. Review the payment table, then click Done:
9. To pay your employees, either download the Bank file or pay manually using the amounts per the Payment column:
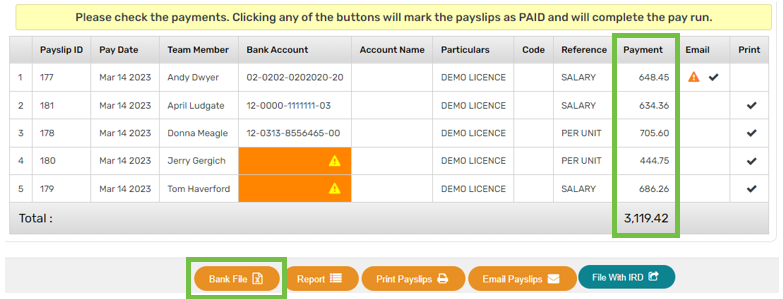
10. Print or email the payslips by clicking the applicable button:

11. Click File with IRD to submit your payday filing:

Understanding the icons & buttons
Step 1, 2, 3, 4 & 5:

- Pay runs report: Displays all pay runs (both complete & incomplete)
- New pay run: To begin a new pay run
- Payday filing: To go to the Payday filing dashboard
- Print: To print the current screen
Step 2:

- Cross icon: To remove an employee from the pay run
- Information icon: To edit pay period details
- Refresh icon: To refresh timesheet
Step 3, 4 & 5:

- Settings & information: To change the pay date, identifier and/or notes
Step 3 & 4:

- Removed team members: To add any employees to the pay run who were accidentally removed in step 2 or who are not showing in the pay run
Step 4 & 5:

- Missing payslips: To add manual payslips to the pay run