Pay wages and final pay together
1. Hover on Payroll then click Run a final pay.
2. Click New final pay.
3. Select the employee(s) by ticking the checkbox next to each relevant employee’s name. You can filter the list by entering a name or selecting a team from the dropdown. Once the employee(s) are selected, click Next.
4. Select a Termination date.
5. Select a Payment category (optional).
6. If there are any upcoming public holidays, enter the number in the Future statutory holidays field.
7. By default, the employee(s) will be deactivated from the system once their final pay is completed. Only uncheck the deactivate team member(s) on completion option if necessary.
8. Enter an Identifier (optional).
9. Enter Notes (optional).
10. Click Next.
11. Review the final pay breakdown (shown on the 50% progress screen), then click Next.
12. Review the final pay summary (shown on the 75% progress screen), then click Complete.
13. Click either Yes or No to paying the employee(s) at the same time as the rest of the team.
14. If you selected Yes, go to Section 1. If you selected No, go to Section 2.
Section 1
1. A prompt saying Visit the Payroll Wizard when you’re ready to pay your team will appear. Click the underlined Payroll Wizard link to go to the Payroll Wizard and complete your pay run as usual.
Section 2
1. Select Yes to paying the employee(s) now.
2. Select the Pay date, then click Pay now.
3. This will take you to step 3 of the Payroll wizard – run your pay as normal:
Pay final pay only (wages already paid)
1. Run the employee(s) pay as normal.
2. Hover on Payroll then click Run a final pay.
3. Click New final pay.
4. Select the employee(s) by ticking the checkbox next to each relevant employee’s name. You can filter the list by entering a name or selecting a team from the dropdown. Once the employee(s) are selected, click Next.
5. Select a Termination date.
6. Select a Payment category (optional).
7. If there are any upcoming public holidays, enter the number in the Future statutory holidays field.
8. By default, the employee(s) will be deactivated from the system once their final pay is completed. Only uncheck the deactivate team member(s) on completion option if necessary.
9. Enter an Identifier (optional).
10. Enter Notes (optional).
11. Click Next.
12. Review the final pay breakdown (shown on the 50% progress screen), then click Next.
13. Review the final pay summary (shown on the 75% progress screen), then click Only pay termination amount and click Complete.
14. On the 100% progress screen, tick Release, then click OK.
15. Click either Yes or No to paying the employee(s) at the same time as the rest of the team.
16. If you selected Yes, go to Section 1. If you selected No, go to Section 2.
Section 1
1. A prompt saying Visit the Payroll Wizard when you’re ready to pay your team will appear. Click the underlined Payroll Wizard link to go to the Payroll Wizard and complete your pay run as usual.
Section 2
1. Select Yes to paying the employee(s) now.
2. Select the Pay date, then click Pay now.
3. This will take you to step 3 of the Payroll wizard – run your pay as normal:
File termination details with IRD
1. Hover on Payroll, then click IRD Payday Filing.
2. Scroll down to Team Members, then click Send Team Member Details.
3. The terminated employee(s) should be automatically selected, but double check to ensure this is the case.
4. Scroll down to the bottom and click Save.
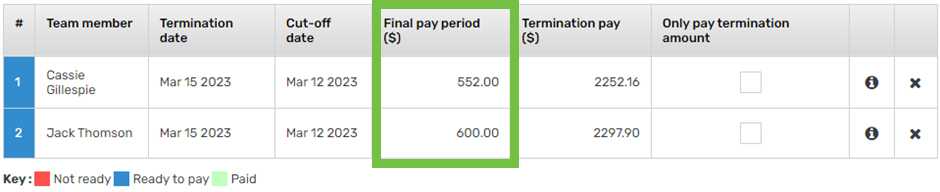
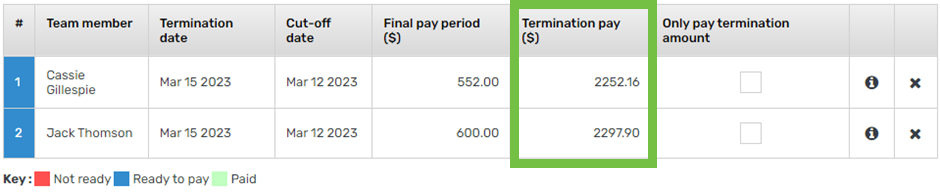
Final pay breakdown
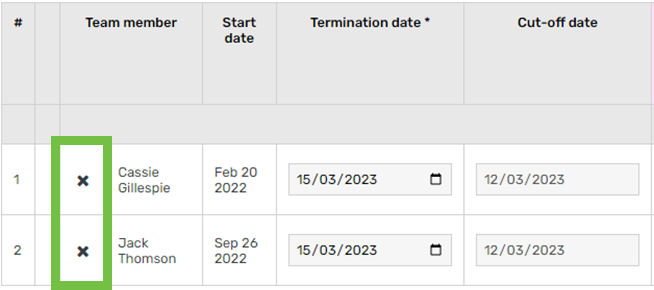
Click the cross icon to remove an employee from the final pay:
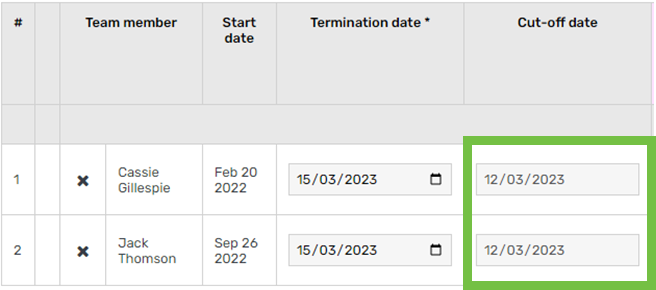
The Cut-off date is the final day of the previous pay period (used for annual leave accrual calculations):
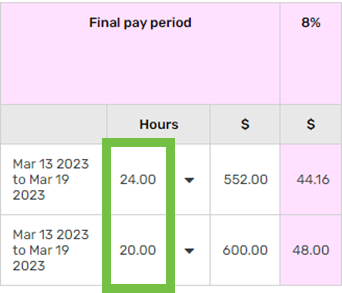
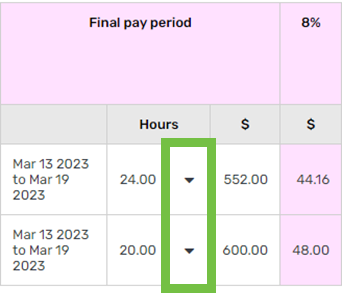
The Hours column pulls through the timesheets for the final pay period:
Click the arrow icon to view, add, edit or delete timesheets:
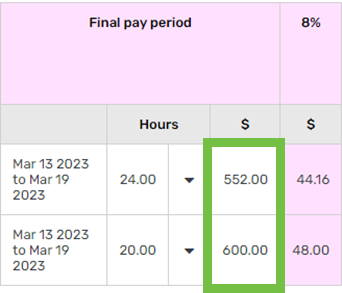
This shows the amount payable for the hours worked in the employee’s final pay period:
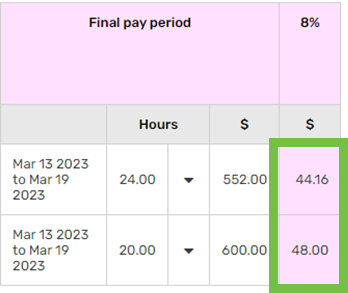
This is 8% of the final pay period earnings:
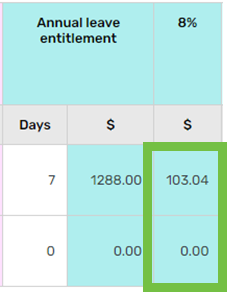
This is the number of annual leave entitlement days that the employee has:
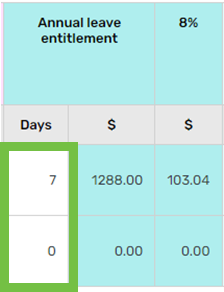
This is the value of annual leave entitlement that the employee has:

This is 8% of the annual leave entitlement value:
This is 8% of the employee’s earnings from their anniversary date (or start date if they haven’t been employed for more than 12 months) to their cut-off date:
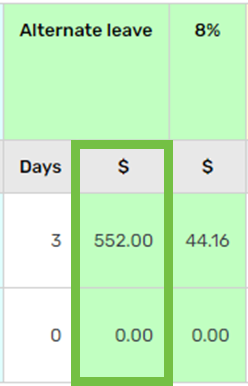
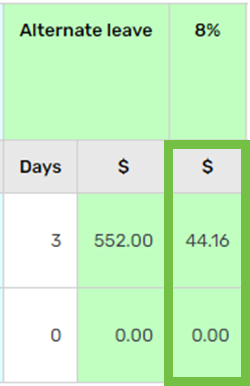
This is the number of alternative leave days that the employee has:
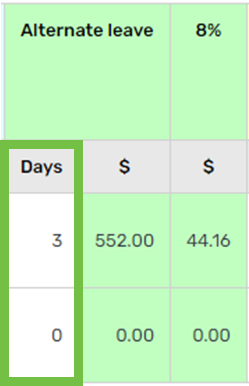
This is the value of alternative leave that the employee has:
This is 8% of the alternative leave value:
This is the number of time bank hours that the employee has:
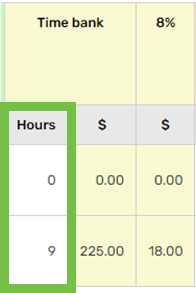
This is the time bank value that the employee has:
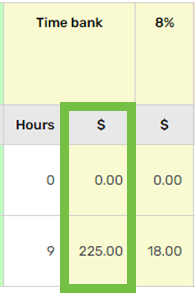
This is 8% of the time bank value:

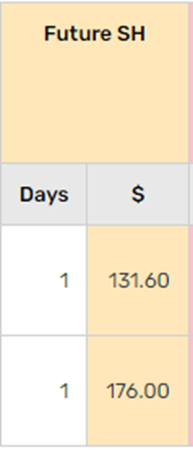
If an employee has annual leave entitlement and there is an upcoming statutory holiday, they may be entitled to this. If so, the days & value will be populated in the columns below:
This the sum of all $ columns except for the Final Pay Period $ column (the employee’s earnings for the period):
Click the information icon to pull up a printable breakdown report for the employee:
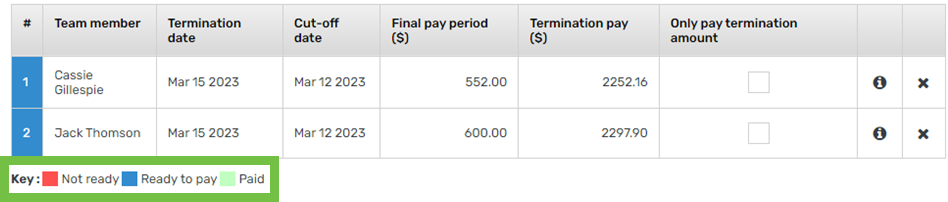
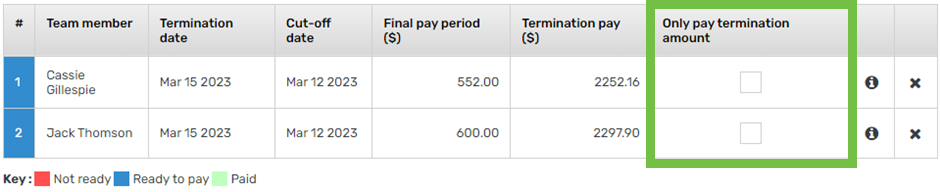
Final pay summary
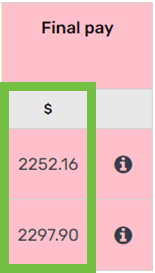
This is the earnings for the final pay period (generated from timesheets):
This is the total amount of leave to pay out (annual, alternative, time bank, future stat days):
If an employee has already been paid their final pay period earnings and only needs to receive their termination pay, click the checkbox in the only pay termination amount column:
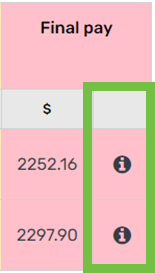
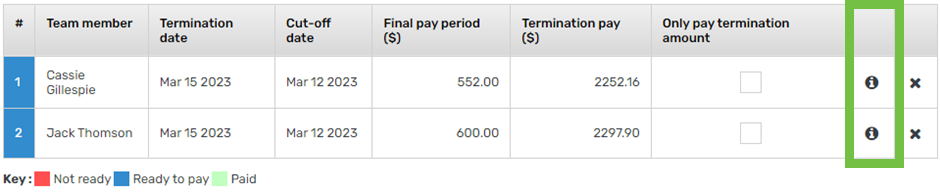
Click the information icon to pull up a printable breakdown report for the employee:
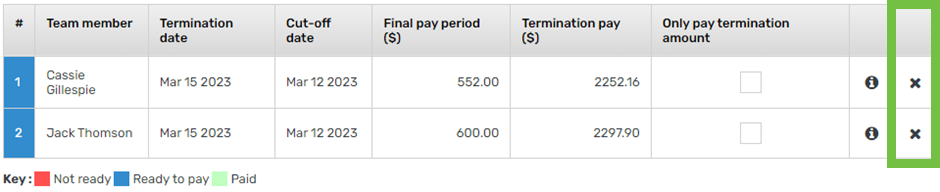
Click the cross icon to remove an employee from the final pay:
Refer to the key to determine if the final pay run can be completed (should be blue at this point):