
Set up a roster
Simple
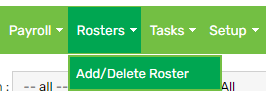
1. Hover on Rosters > click Add/Delete Roster:
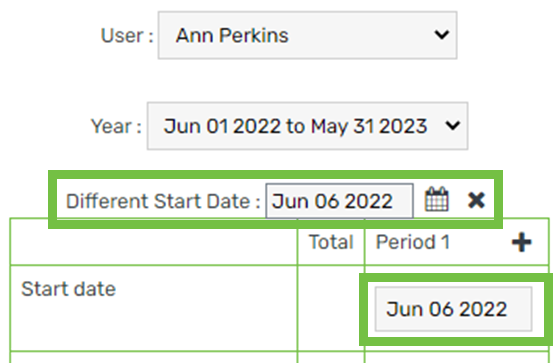
2. Select a User:

3. Change the Year if applicable:

4. If the employee’s first day on for the season is not 01/06, choose the date that corresponds to their actual first day on in the Different Start Date field:

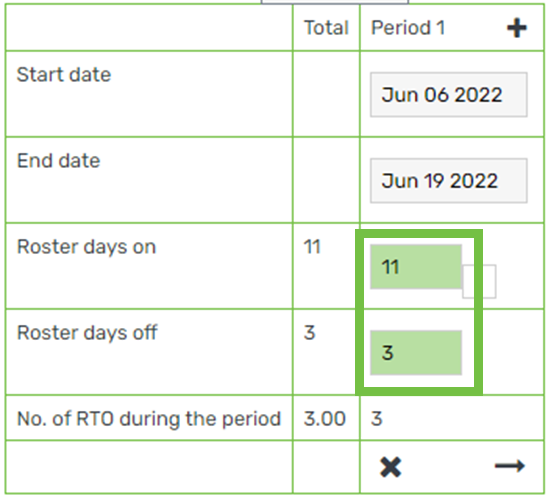
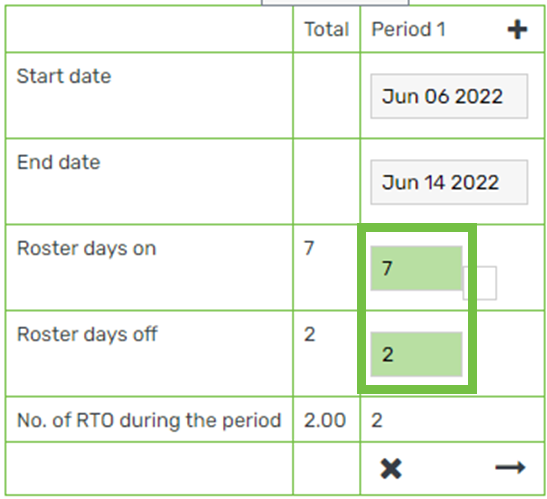
5. Enter the roster period:
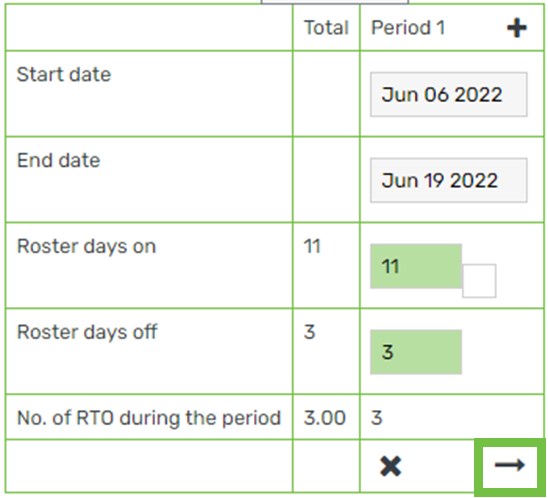
6. Click the arrow:
7. Click Save to roster calendar
Alternating
1. Hover on Rosters > click Add/Delete Roster:
2. Select a User:
3. Change the Year if applicable:
4. If the employee’s first day on for the season is not 01/06, choose the date that corresponds to their actual first day on in the Different Start Date field:
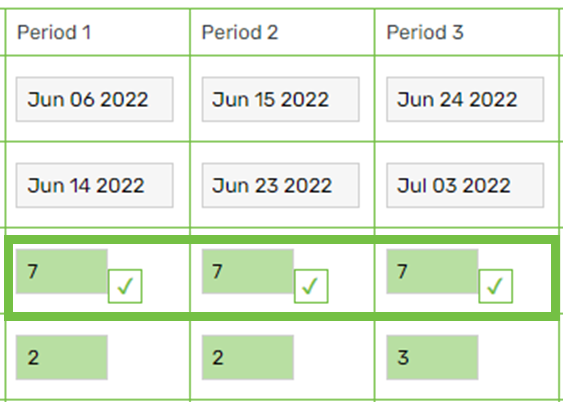
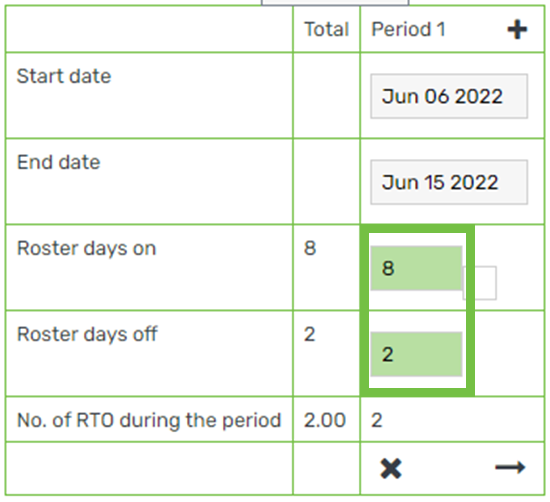
5. Enter the first roster period:
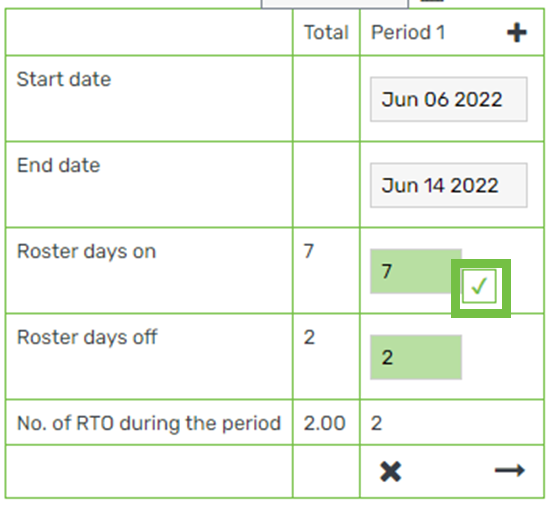
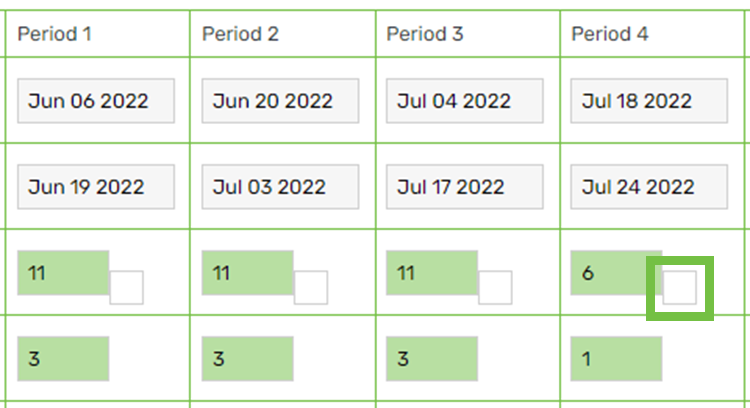
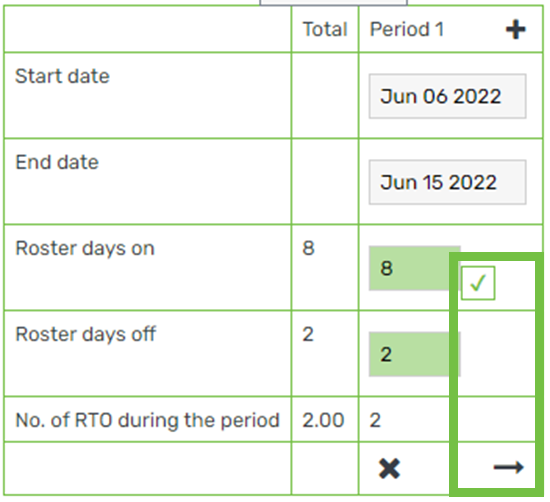
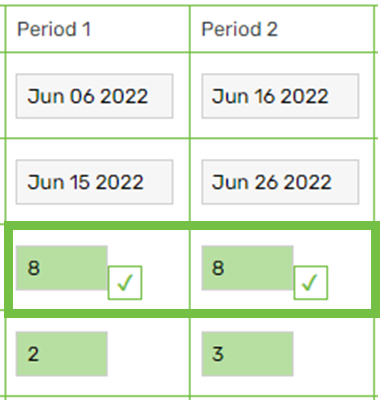
6. Click the checkbox:
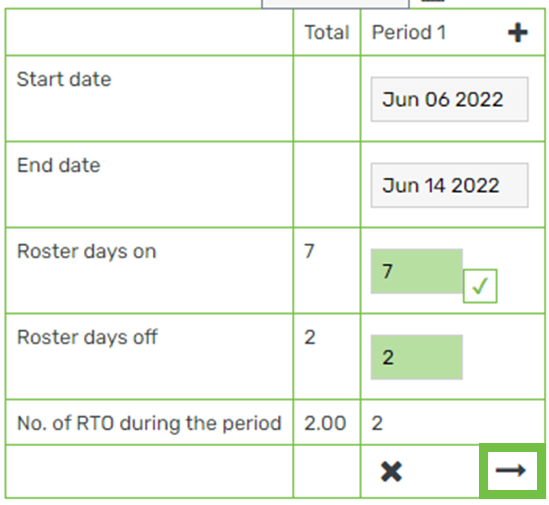
7. Click the arrow:
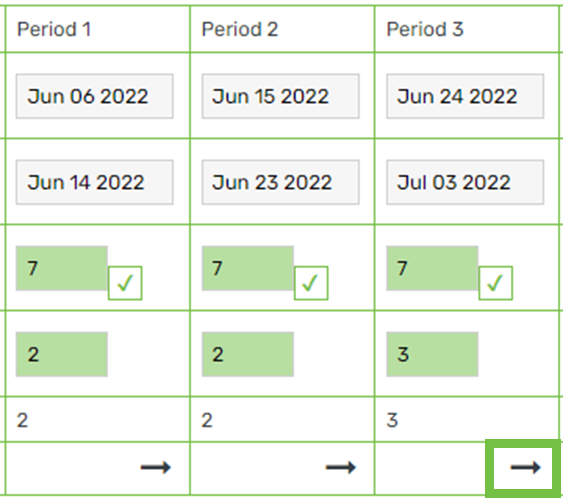
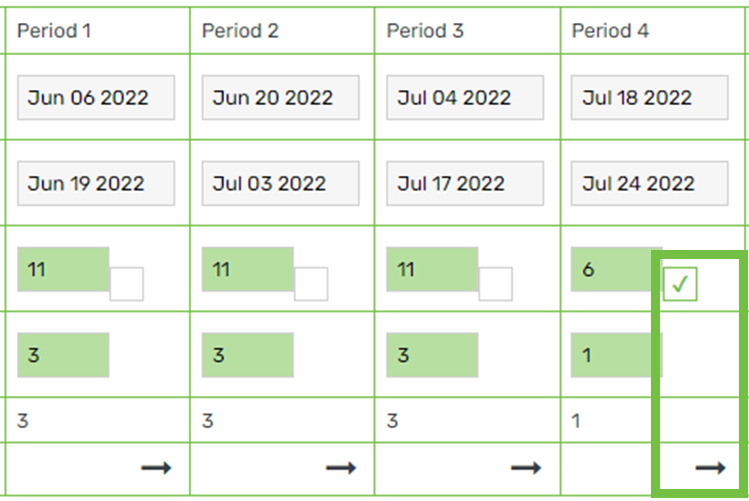
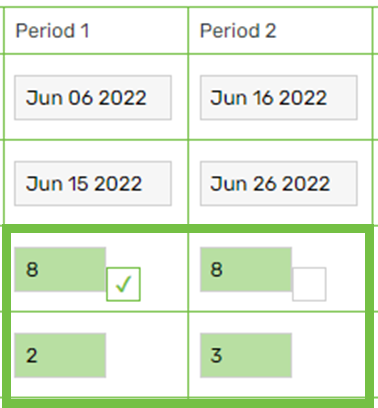
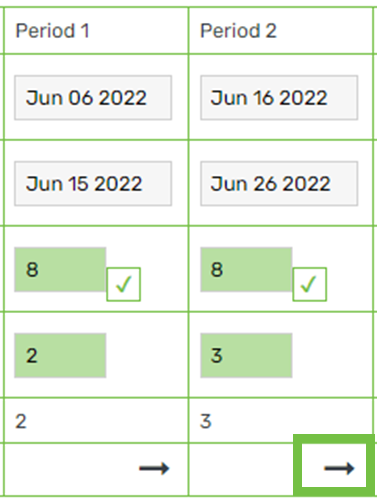
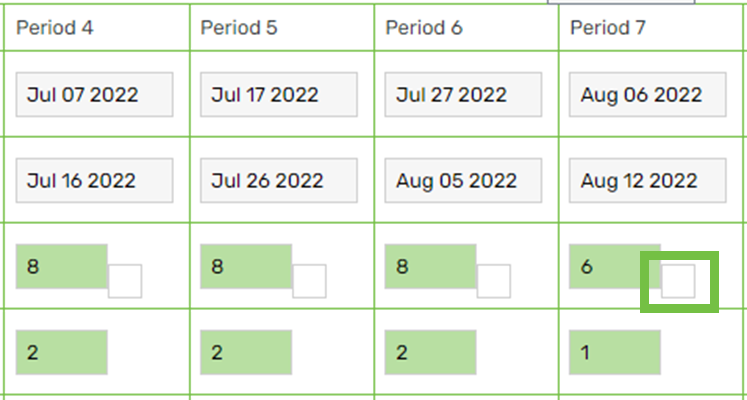
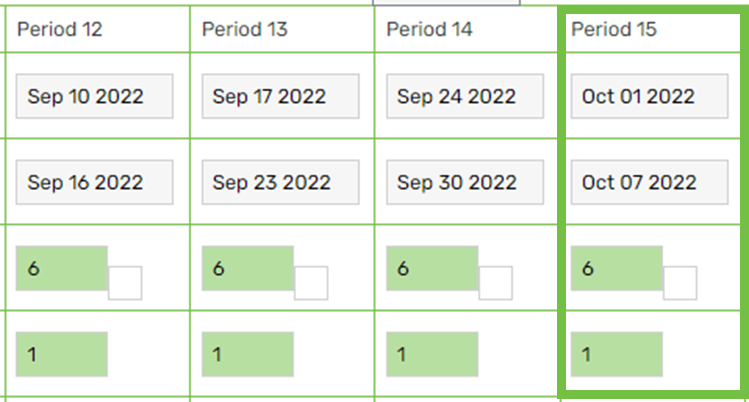
8. Enter the alternating roster pattern:
9. Select the checkbox in each period to confirm the roster pattern:
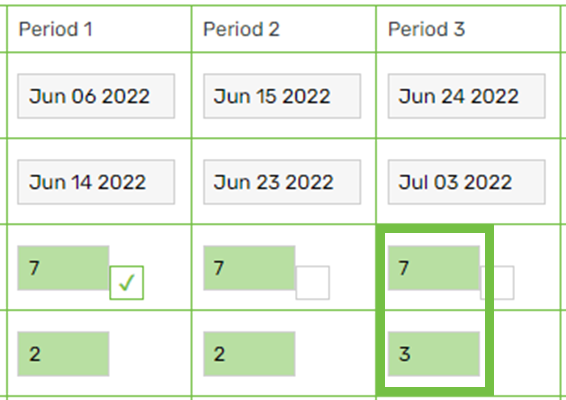
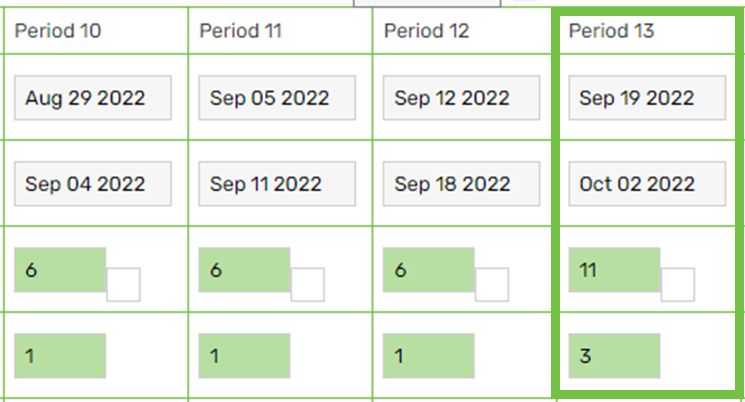
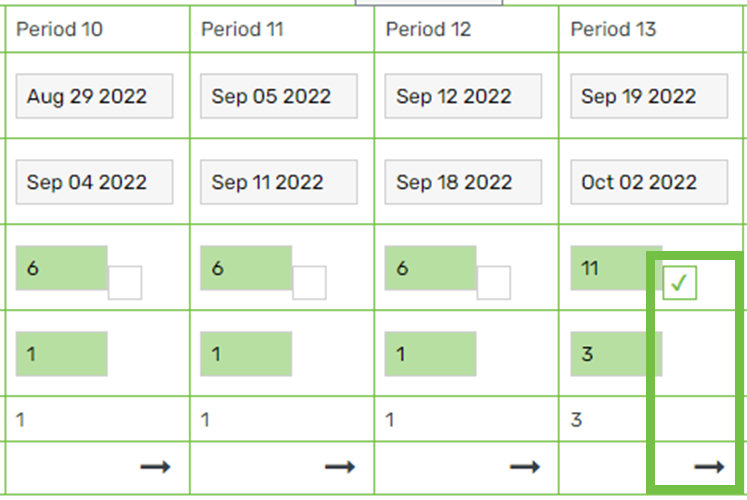
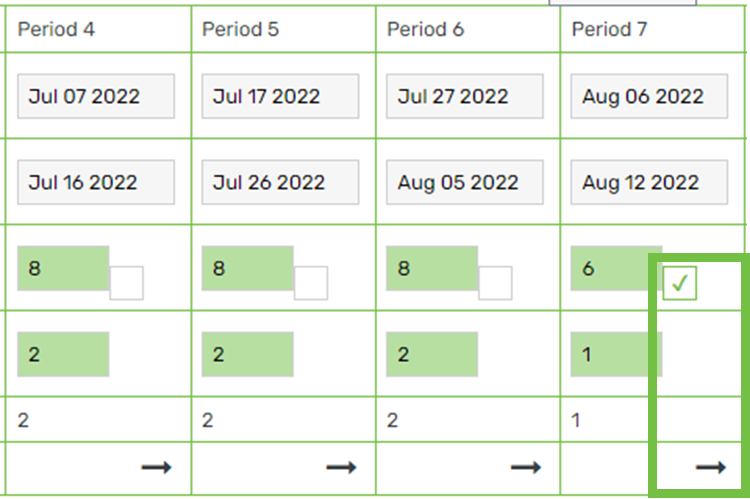
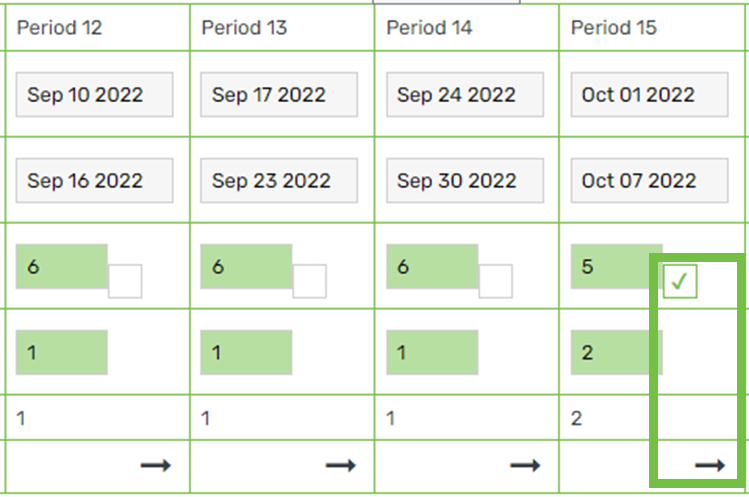
10. Locate the period that contains the final part of the roster pattern and click the arrow:
11. Click Save to roster calendar
Simple with change in the season
1. Hover on Rosters > click Add/Delete Roster:
2. Select a User:
3. Change the Year if applicable:
4. If the employee’s first day on for the season is not 01/06, choose the date that corresponds to their actual first day on in the Different Start Date field:
5. Enter the first roster period:
6. Click the arrow:
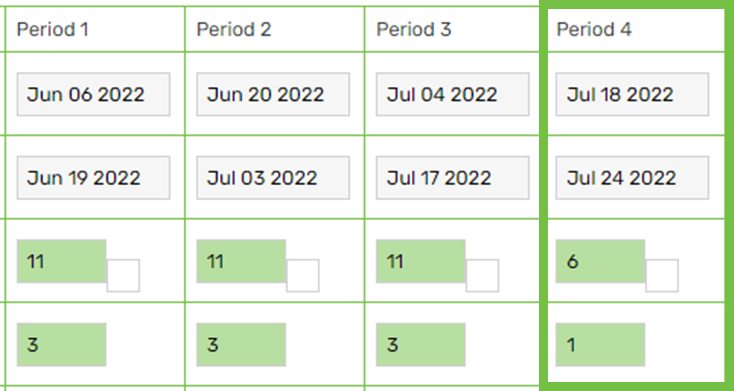
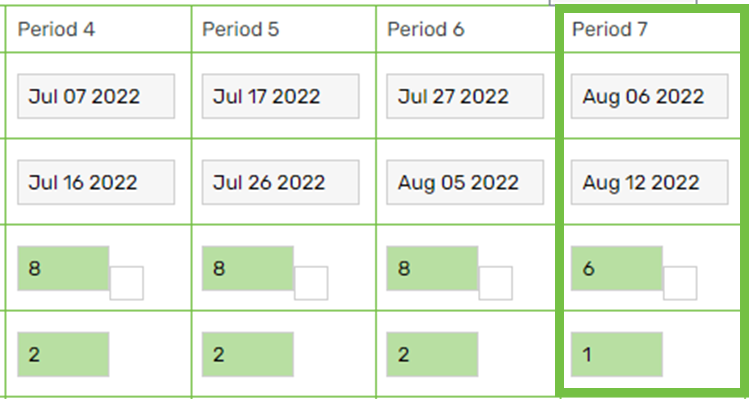
7. Locate the period where the roster changes:
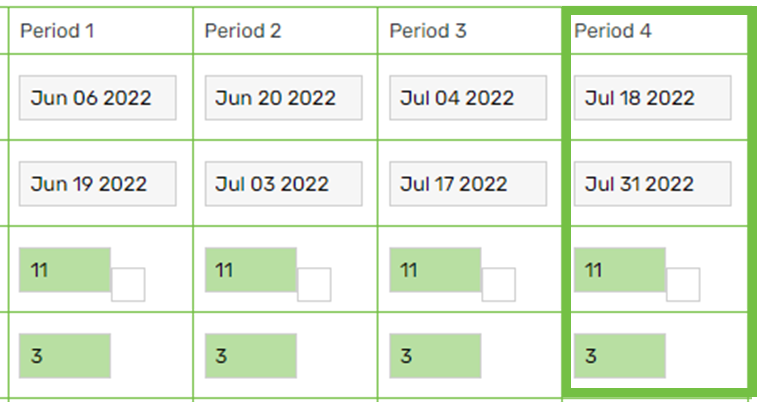
8. Change the pattern accordingly:
9. Click the checkbox then click the arrow:
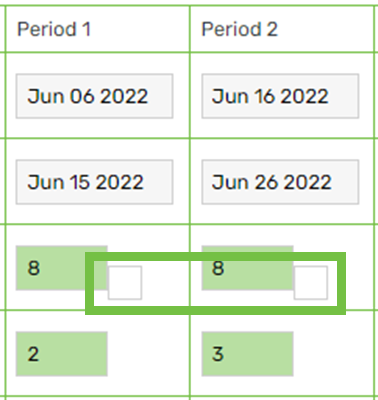
10. Untick the checkbox:
11. Locate the period where the roster changes back:
12. Change the pattern accordingly:
13. Click the checkbox then click the arrow:
14. Click Save to roster calendar
Complex
1. Hover on Rosters > click Add/Delete Roster:
2. Select a User:
3. Change the Year if applicable:
4. If the employee’s first day on for the season is not 01/06, choose the date that corresponds to their actual first day on in the Different Start Date field:
5. Enter the first roster period:
6. Click the checkbox then click the arrow:
7. Enter the alternating roster pattern:
8. Select the checkbox in each period to confirm the roster pattern:
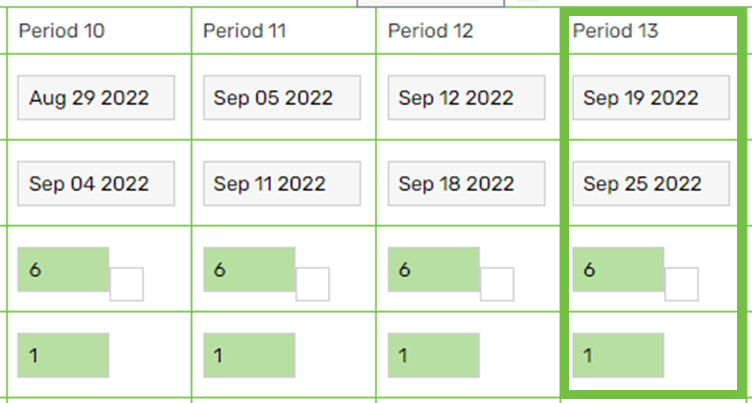
9. Locate the period that contains the final part of the roster pattern and click the arrow:
10. Untick the checkboxes:
11. Locate the period where the roster changes:

12. Change the pattern accordingly:
13. Click the checkbox then click the arrow:
14. Untick the checkbox:
15. Locate the period where the roster changes:
16. Change the pattern accordingly:

17. Click the checkbox then click the arrow:
18. Click Save to roster calendar
Casual
1. Click Rosters:

2. Locate the employee:
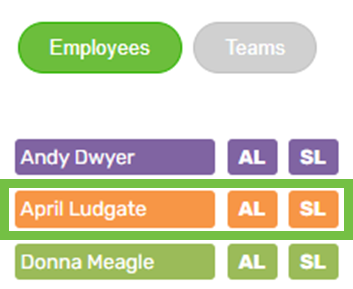
3. Click and hold the cursor on the employee’s name, then drag and drop it onto the desired date on the calendar:

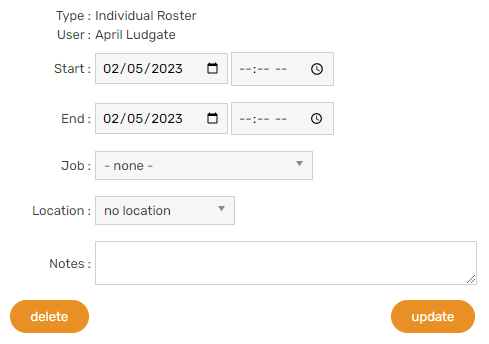
4. To add additional rostered days on, click the employee’s name on the calendar
5. Adjust the date(s) then click Update:
Delete a roster
1. Hover on Rosters > click Add/Delete Roster:
2. Select a User:
3. Change the Year if applicable:
4. Click Clear all
5. Click OK
6. Click Save to roster calendar
Roster colour
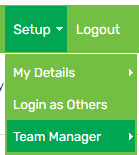
1. Hover on Setup > click on Team Manager:
2. Click on the employee’s name
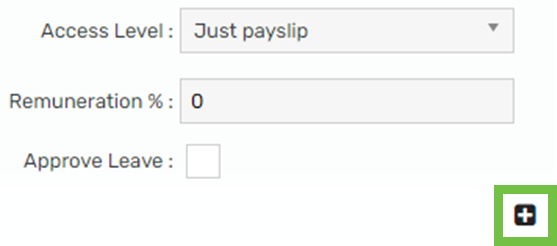
3. Click the plus icon at the bottom of the General tab:
4. Update the Roster display colour:

5. Click Save