Creating an individual timesheet
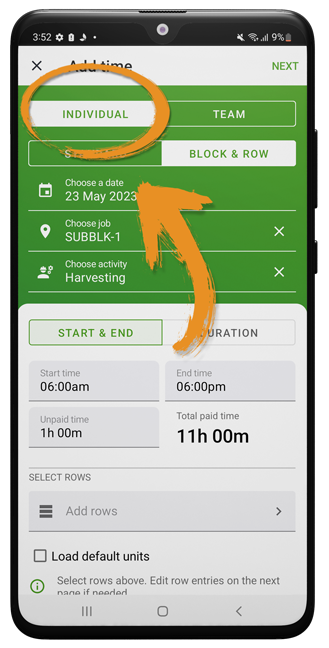
1. Once you have made it to the ‘Block & Row’ timesheet section of the AgriSmart app, select ‘Individual’:
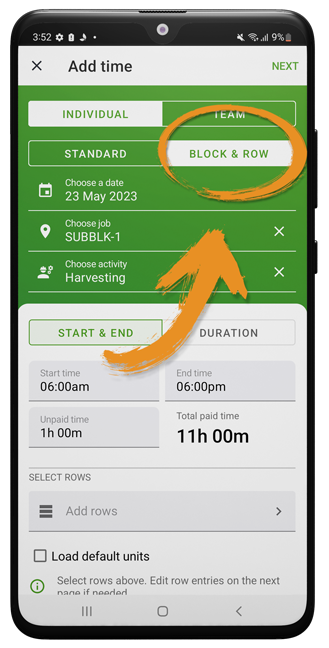
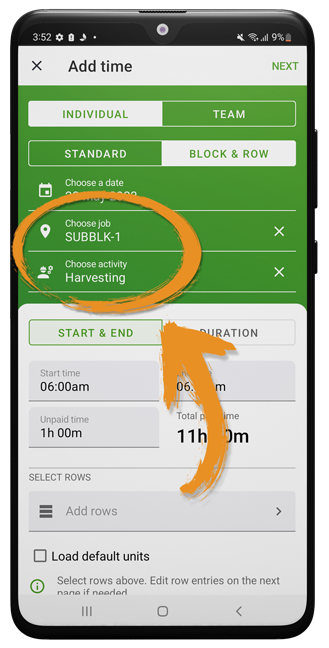
2. Check that ‘Block & Row’ is selected:
3. Select the correct date (note it will automatically select today’s date):
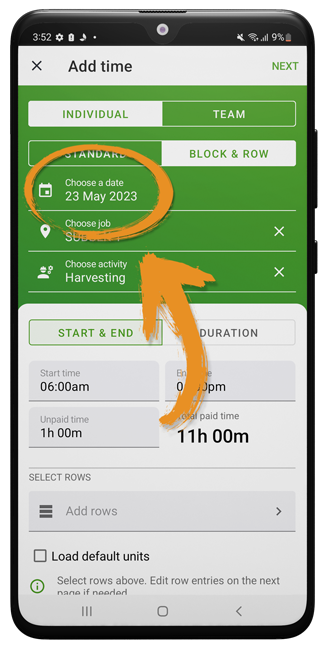
4. Select the ‘Job’ and ‘Activity’:
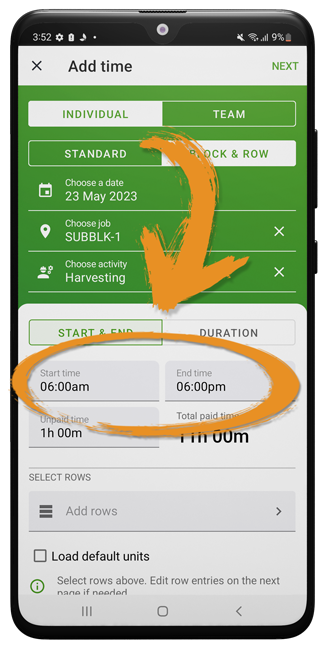
5. Select the start and end time that is to be entered, or alternatively, a duration of time:
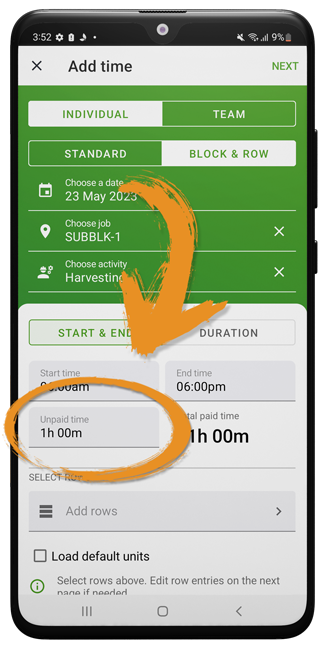
6. Enter in any unpaid time (for example, the team’s lunch break).
Note: If the timesheet ran past midnight this will automatically be organised across two days automatically.
Selecting rows
7. Click ‘Add rows’ and select the rows in which you have worked on:
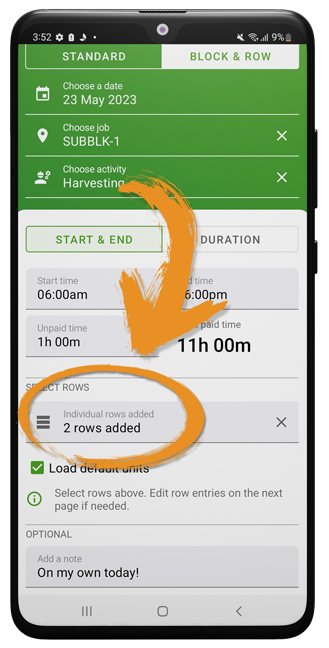
8. Select whether to ‘Load default units’ (this will assign the default units allocated to each row, whether they are actual, theoretical, or producing quantities):
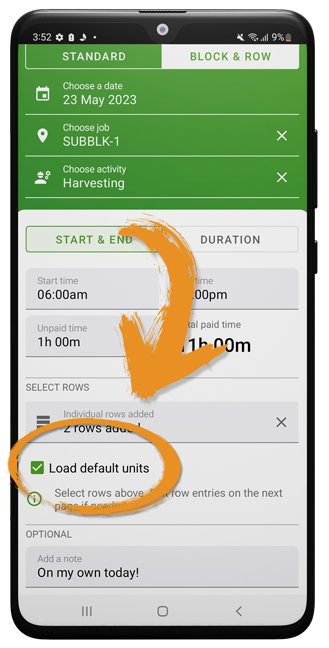
9. You then have the option to ‘Add a note’:
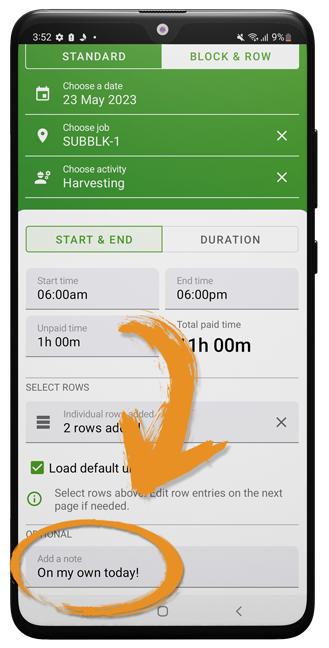
10. Click ‘Next’:

Edit rows
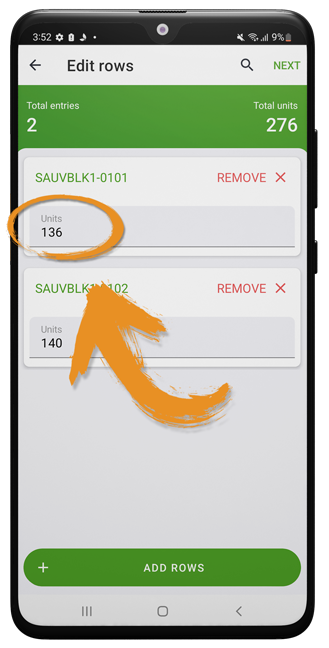
11. (Optional) If default units are not used or units vary from default units, adjust these on this interface:
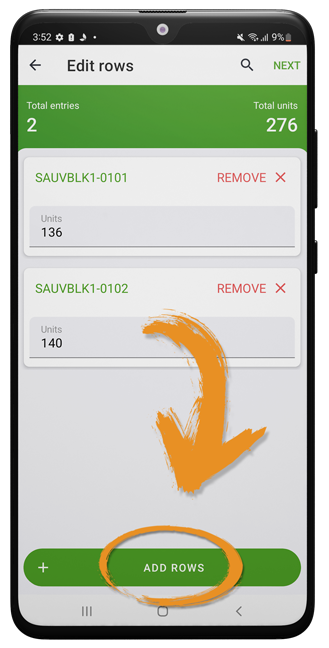
12. (Optional) To add additional rows that were not selected in the prior section, simply tap ‘Add Rows’ at the bottom of the screen:
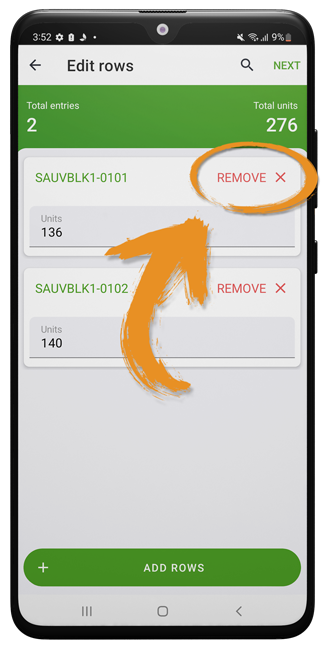
13. (Optional) To delete the row, tap the red ‘Remove’ icon at the top of the row selection box:
Completing the timesheet
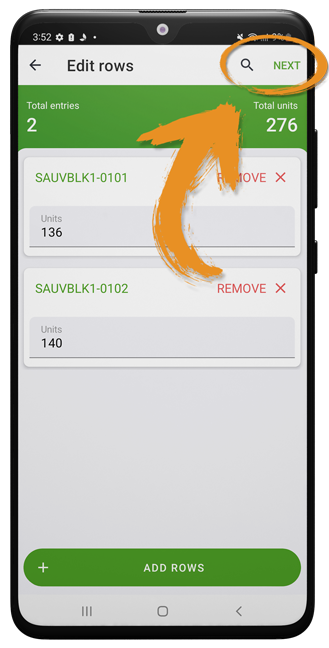
13. Click ‘Next’:
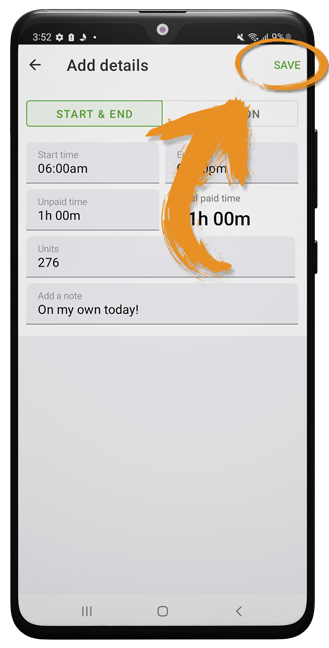
14. Review the information is correct (this is the last stage to make adjustments and timesheets can be edited or deleted on an individual level):

15. Click ‘Save’:
16. Once the app has completed uploading your timesheets you will arrive on the timesheets section of AgriSmart, you will now be able to see the uploaded timesheets: