
General
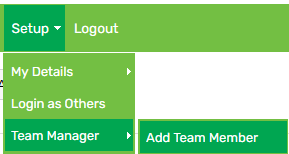
1. Hover on Setup > Team Manager > click Add Team Member:
2. Enter an Employee Code (optional)
3. Enter a Username
4. A password is automatically created (see orange highlight). To change this, input a new password in the blank field (see green highlight):

5. Enter the administrator’s First Name and Last Name
6. Select Admin only in the Employee Type field
7. Select Nil in the Remuneration Type field
8. Select Non-RSE in the RSE worker field
9. Select Nil in the Pay Frequency field
10. Select the administrator’s Start Date
11. Enter an Email Address
12. Enter a Job Title (optional)
13. Select a Team (optional)
14. Select a Primary Location and Other Locations (optional)
15. Select the Administrator Access Level
16. Ignore the Remuneration % field
17. If the administrator should be authorised to approve employees’ leave, tick Approve Leave
18. Click Add
Notes (optional)
1. Click on the Notes tab:

2. Type a note in the blank field then click Add note
Reminders (optional)
1. Click on the Reminders tab:

2. Click Add reminder
3. Enter the reminder details, then click Save
Job Costing (optional)
1. Click on the Job Costing tab:

2. Enter the job costing details, then click Save
User Files (optional)
1. Click on the User Files tab:

2. Click Upload File
3. Enter the file details, then click Save
Preferences (optional)
1. Click on the Preferences tab:

2. The following information can be added here:
- Personal details
- Phone number(s)
- Address
- Gender
- Date of birth
- Next of kin details
- Visa details
- Nationality
- Passport number
- Job position
- Visa type
- Visa expiry
- Medical information
- Look, feel & security
- Multi-factor authentication
- Timesheet settings
- SWSAS deductions
3. Click Save
Teams (optional)
1. Click on the Teams tab:

2. Select the team(s) that the administrator will manage, then click Save